Fixing Xbox One Elite Controller Sticky Buttons

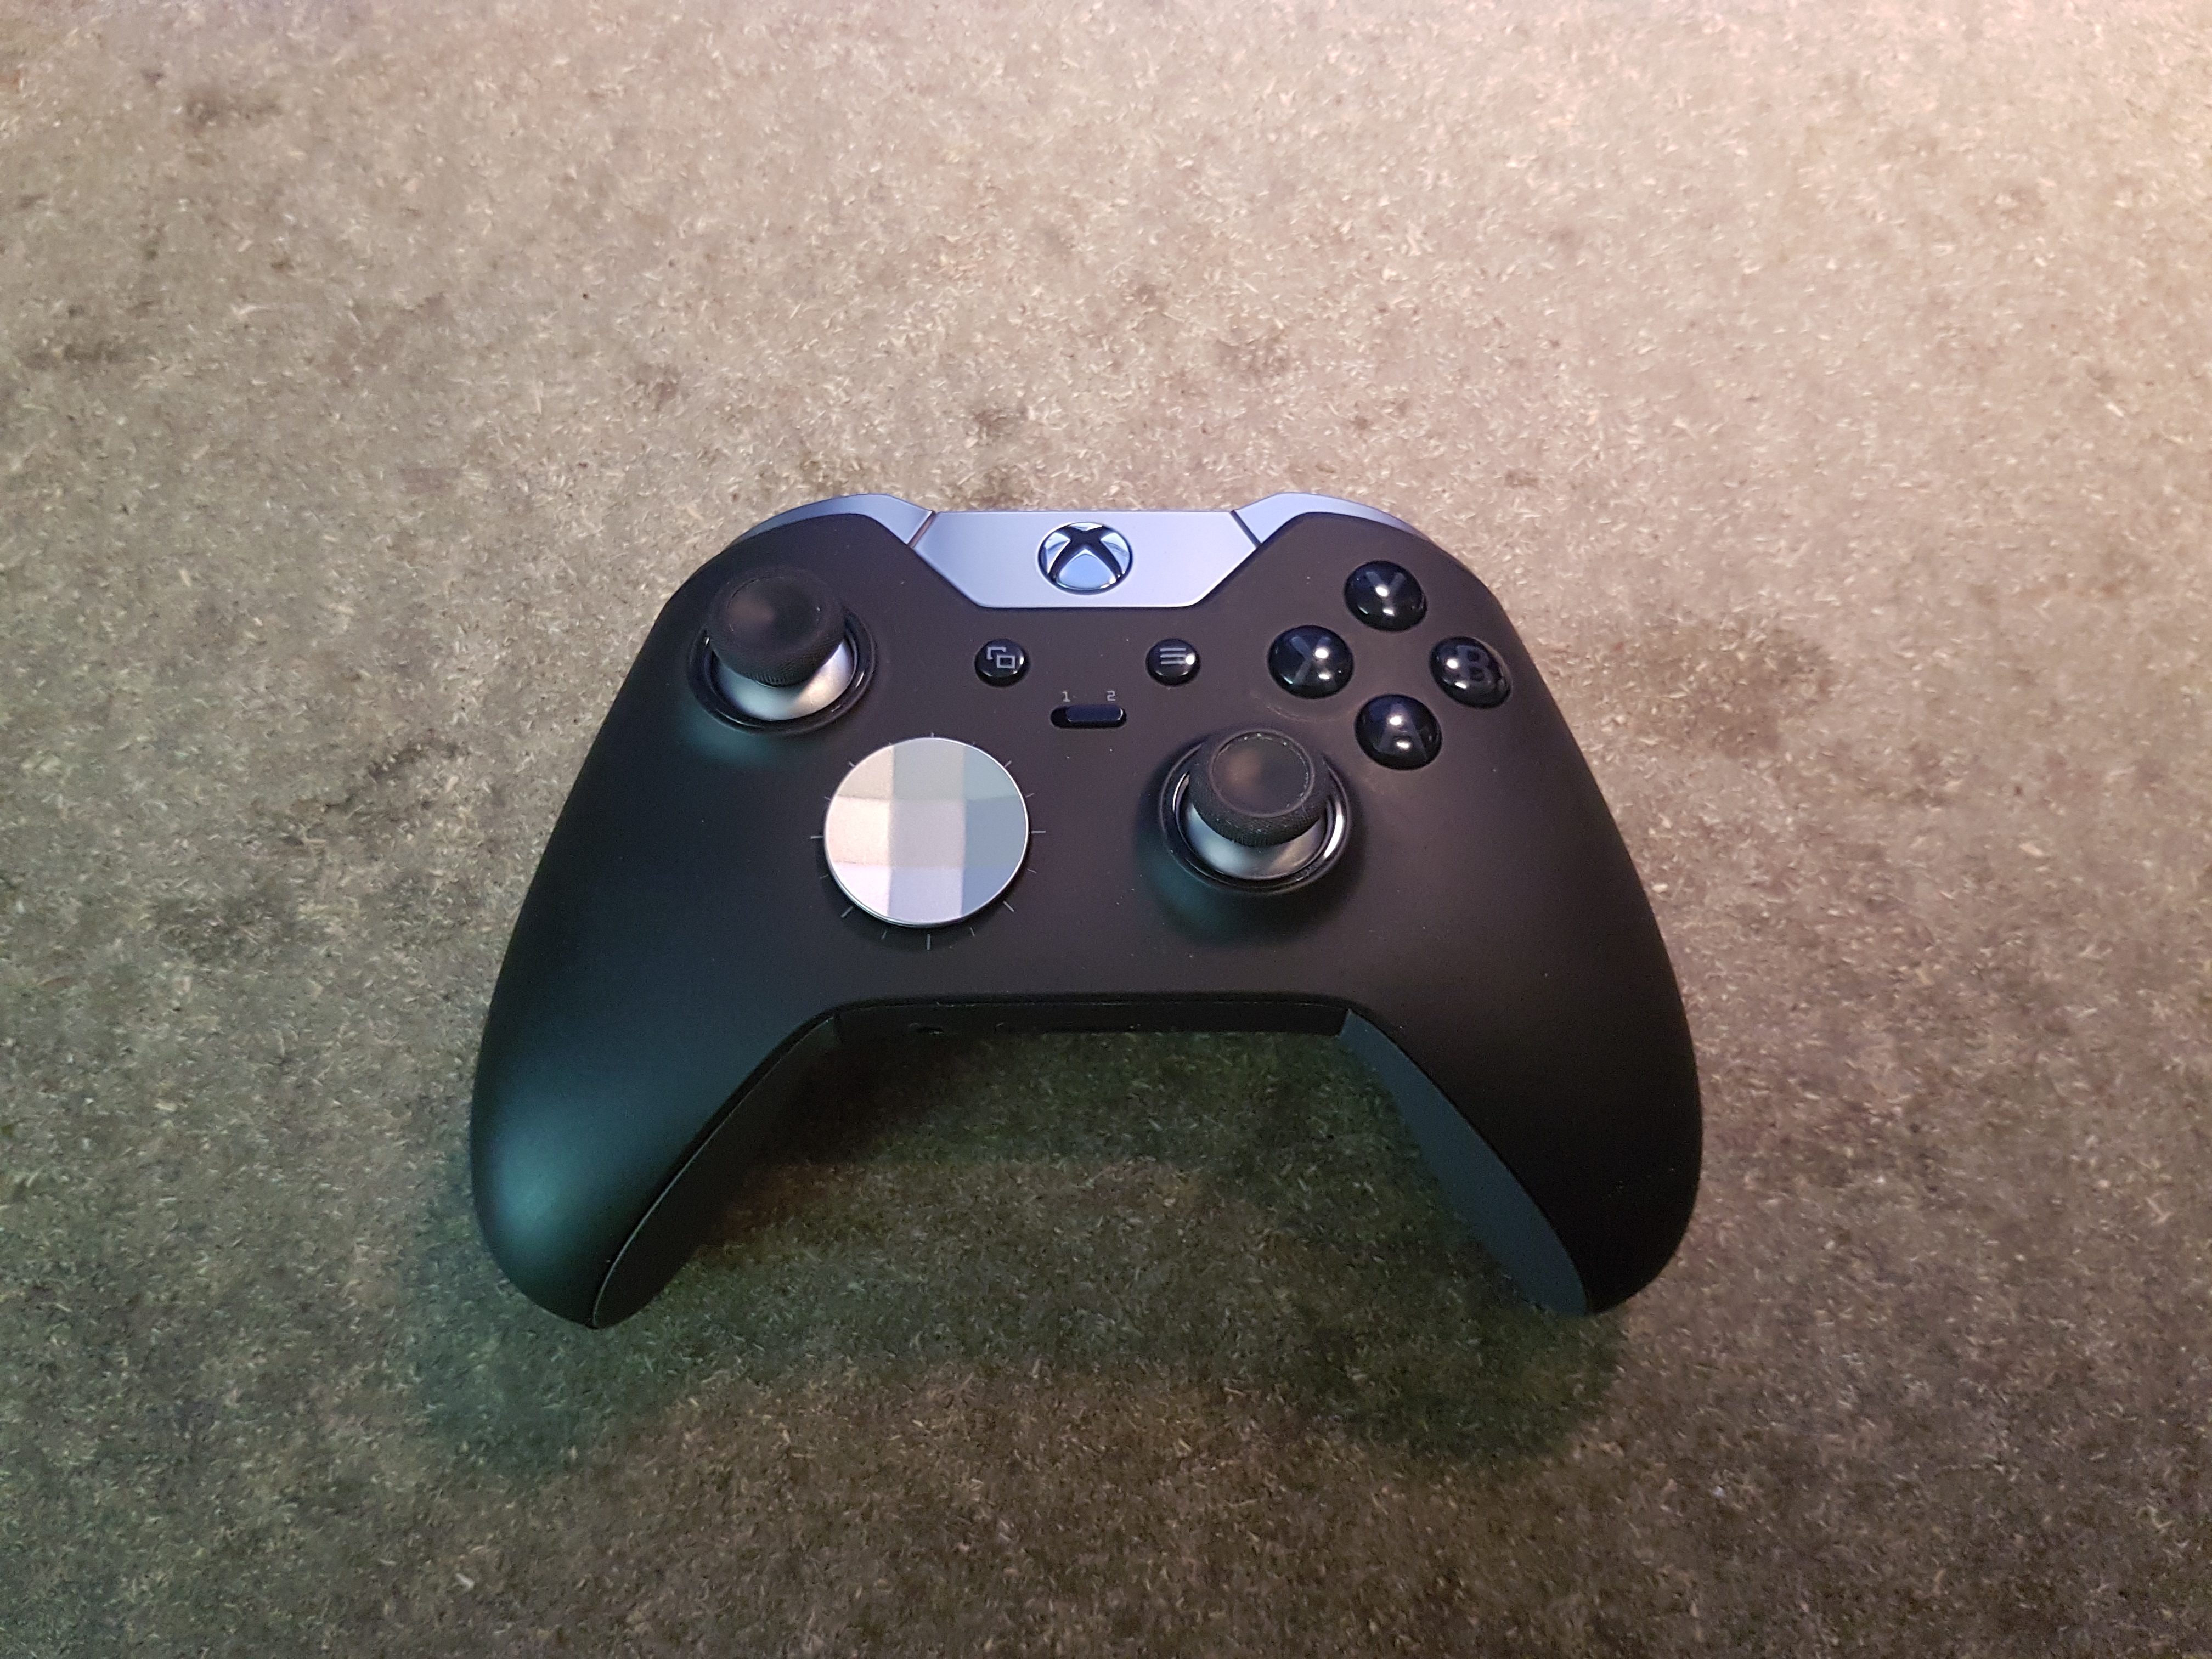
When Red Dead Redemption 2 was released, my best friend bought it and she enjoyed it so much I wanted to play with it too. But my Xbox One hadn't been started in months, and it took a while to update the beast. After installing the game, I took my favorite controller, which is my Xbox One Elite Controller. It's a fantastic piece of electronics, although a bit expensive if bought without a discount.
While playing, I immediately felt that something was wrong. The A, B, X and Y buttons where all a bit sticky. It felt like the buttons weren't getting back up until all the pressure was removed (ie. until you removed your fingers completely). Usually, you could keep your fingers on the buttons, and just apply more pressure to activate them, but not this time. This drove me a bit crazy, because in some games you really need some reactivity, and the controller just wasn't cutting it anymore.
What's the problem ?
After searching for a while, it looks like it's a cleaning problem. The controller needs to be cleaned to work properly again. Most of this blog post applies to the standard Xbox Controller.
Let's tear down this controller
Just a little disclaimer before starting: This will completely void your warranty, and, obviously, I can't be held responsible if you break your controller while following this page's instructions, you're doing this at your own risk.
🔧 The tools you'll need:
- A security Torx TR8 screw driver (the ones with a hole in the middle)
- A standard Torx TR6 screw driver
- A soldering iron
- Some cleaning alcohol
- And, for the most organised / tooled, a magnetic mat for the screws
I'm personally using an iFixit screwdriver kit that contains everything you'll ever need to repair this kind of electronic devices. If you want to know which one I used, please let me know in the comments.
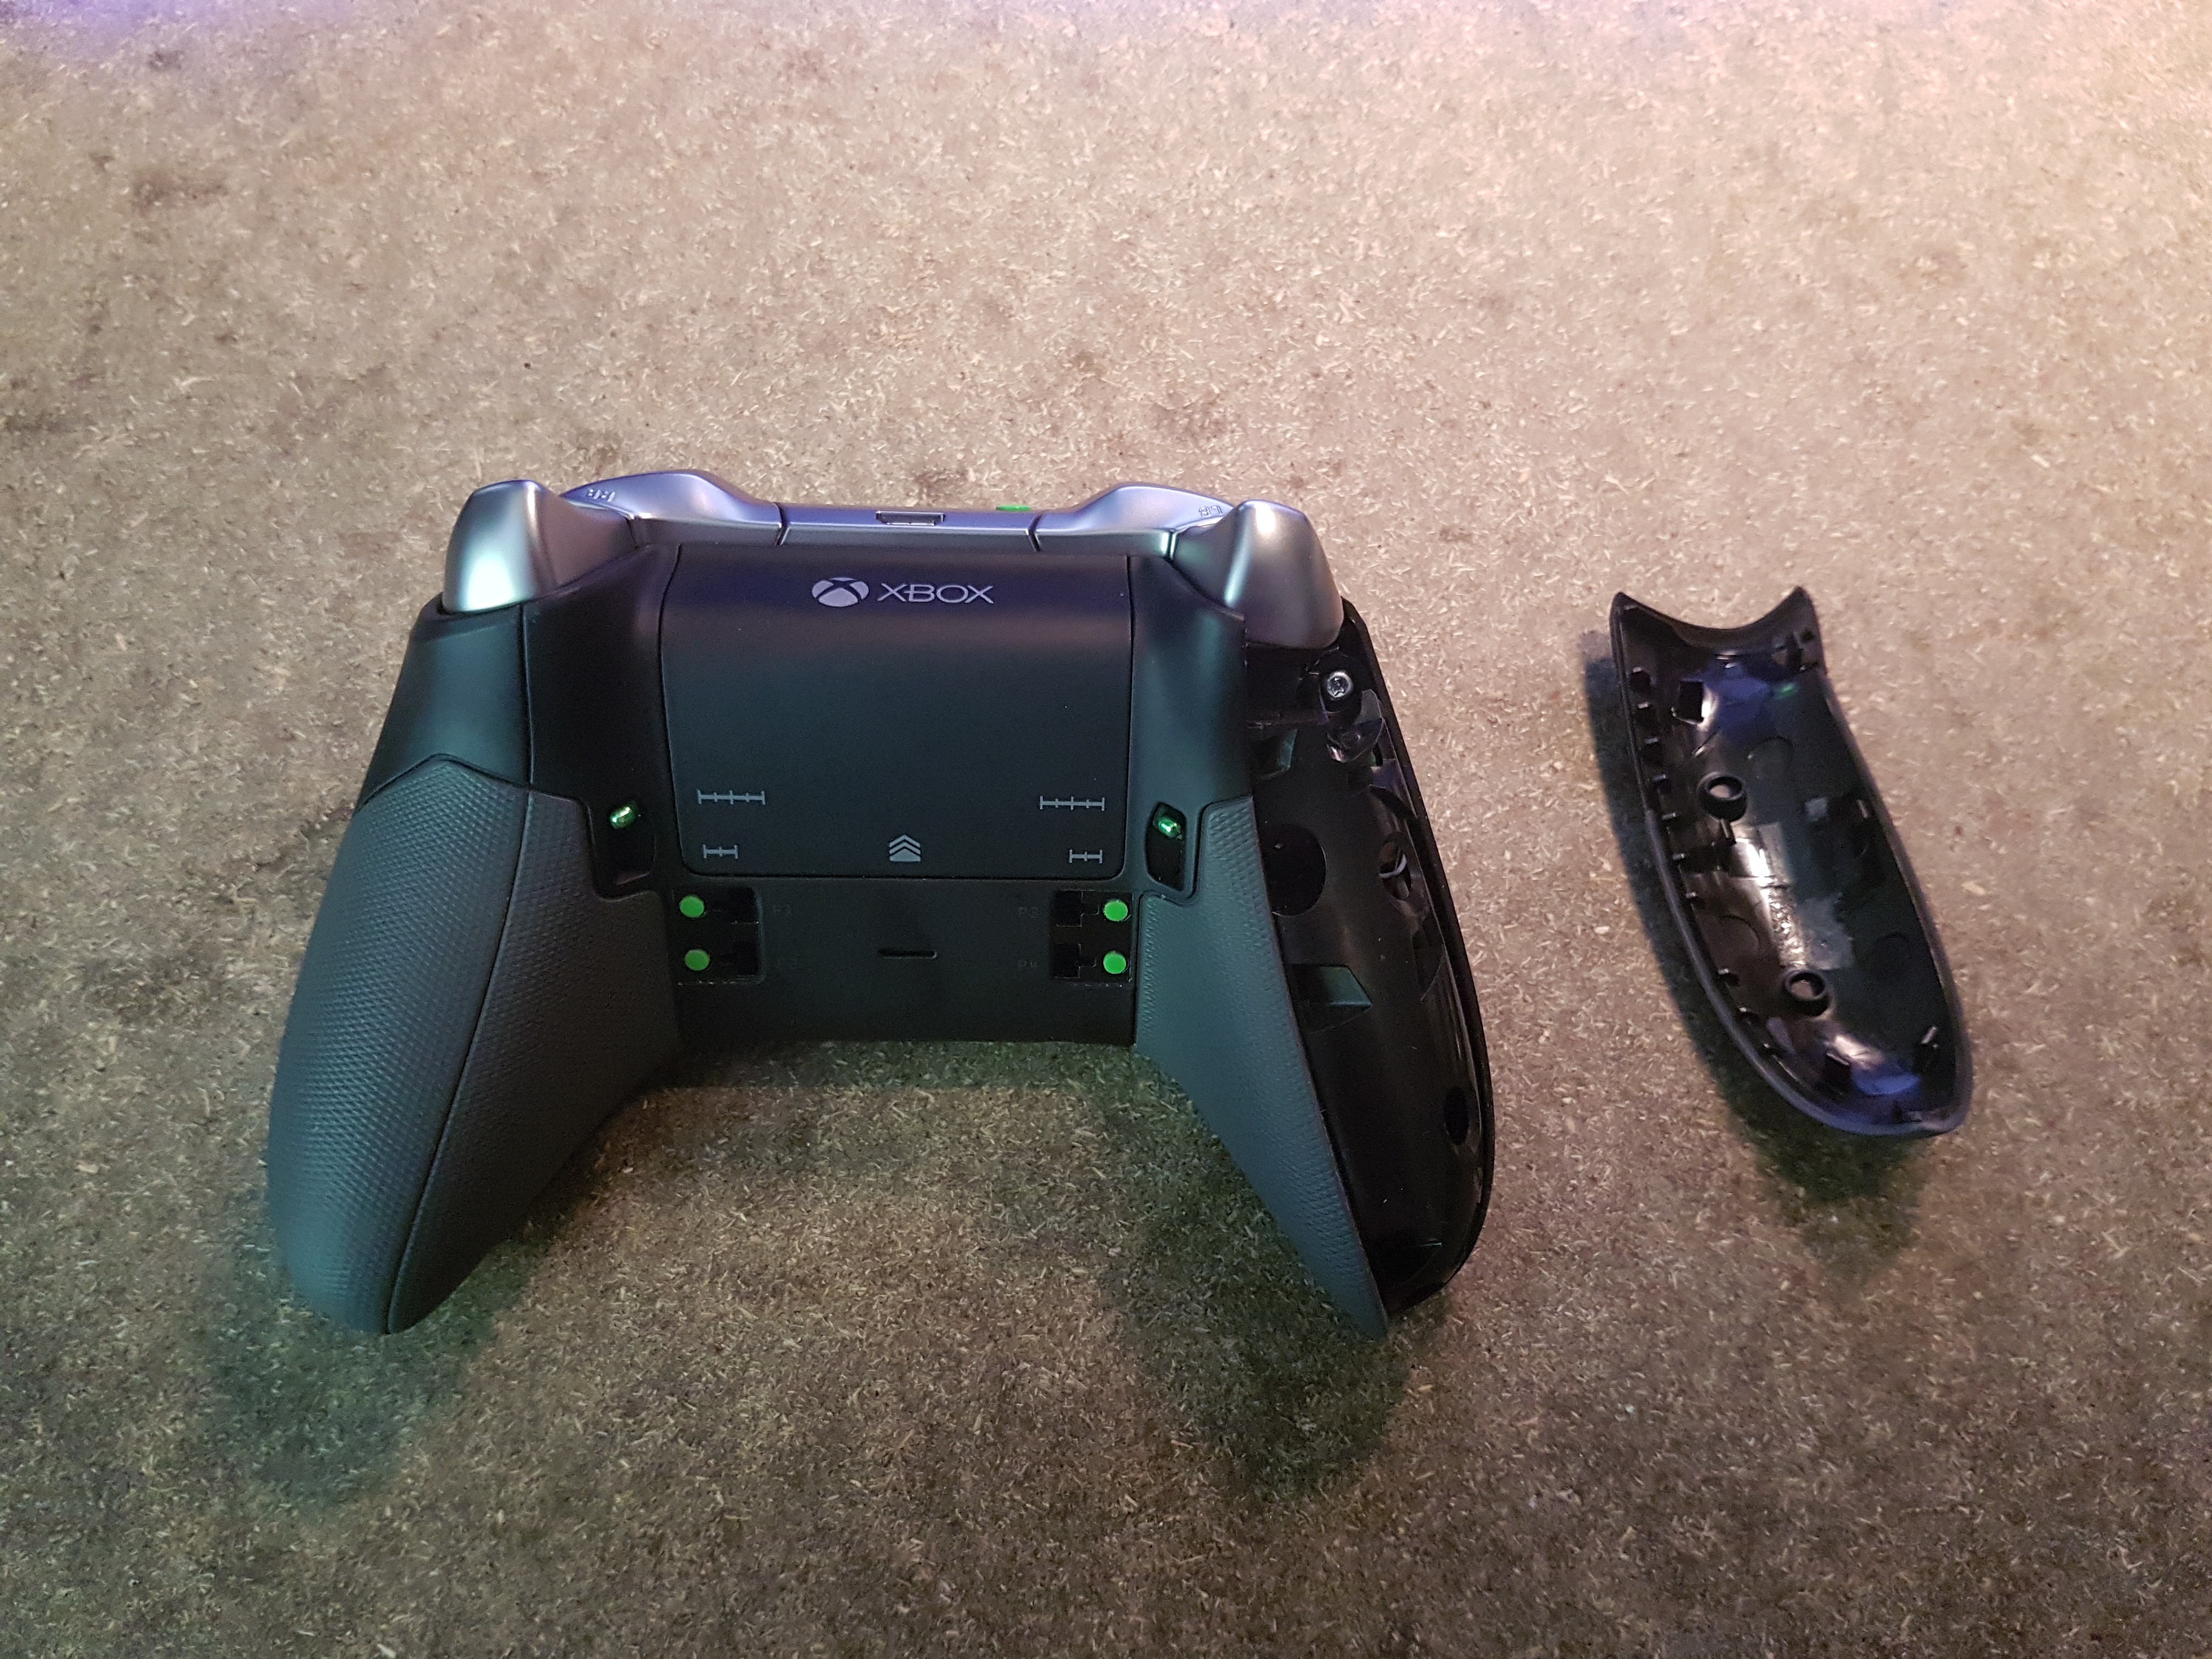
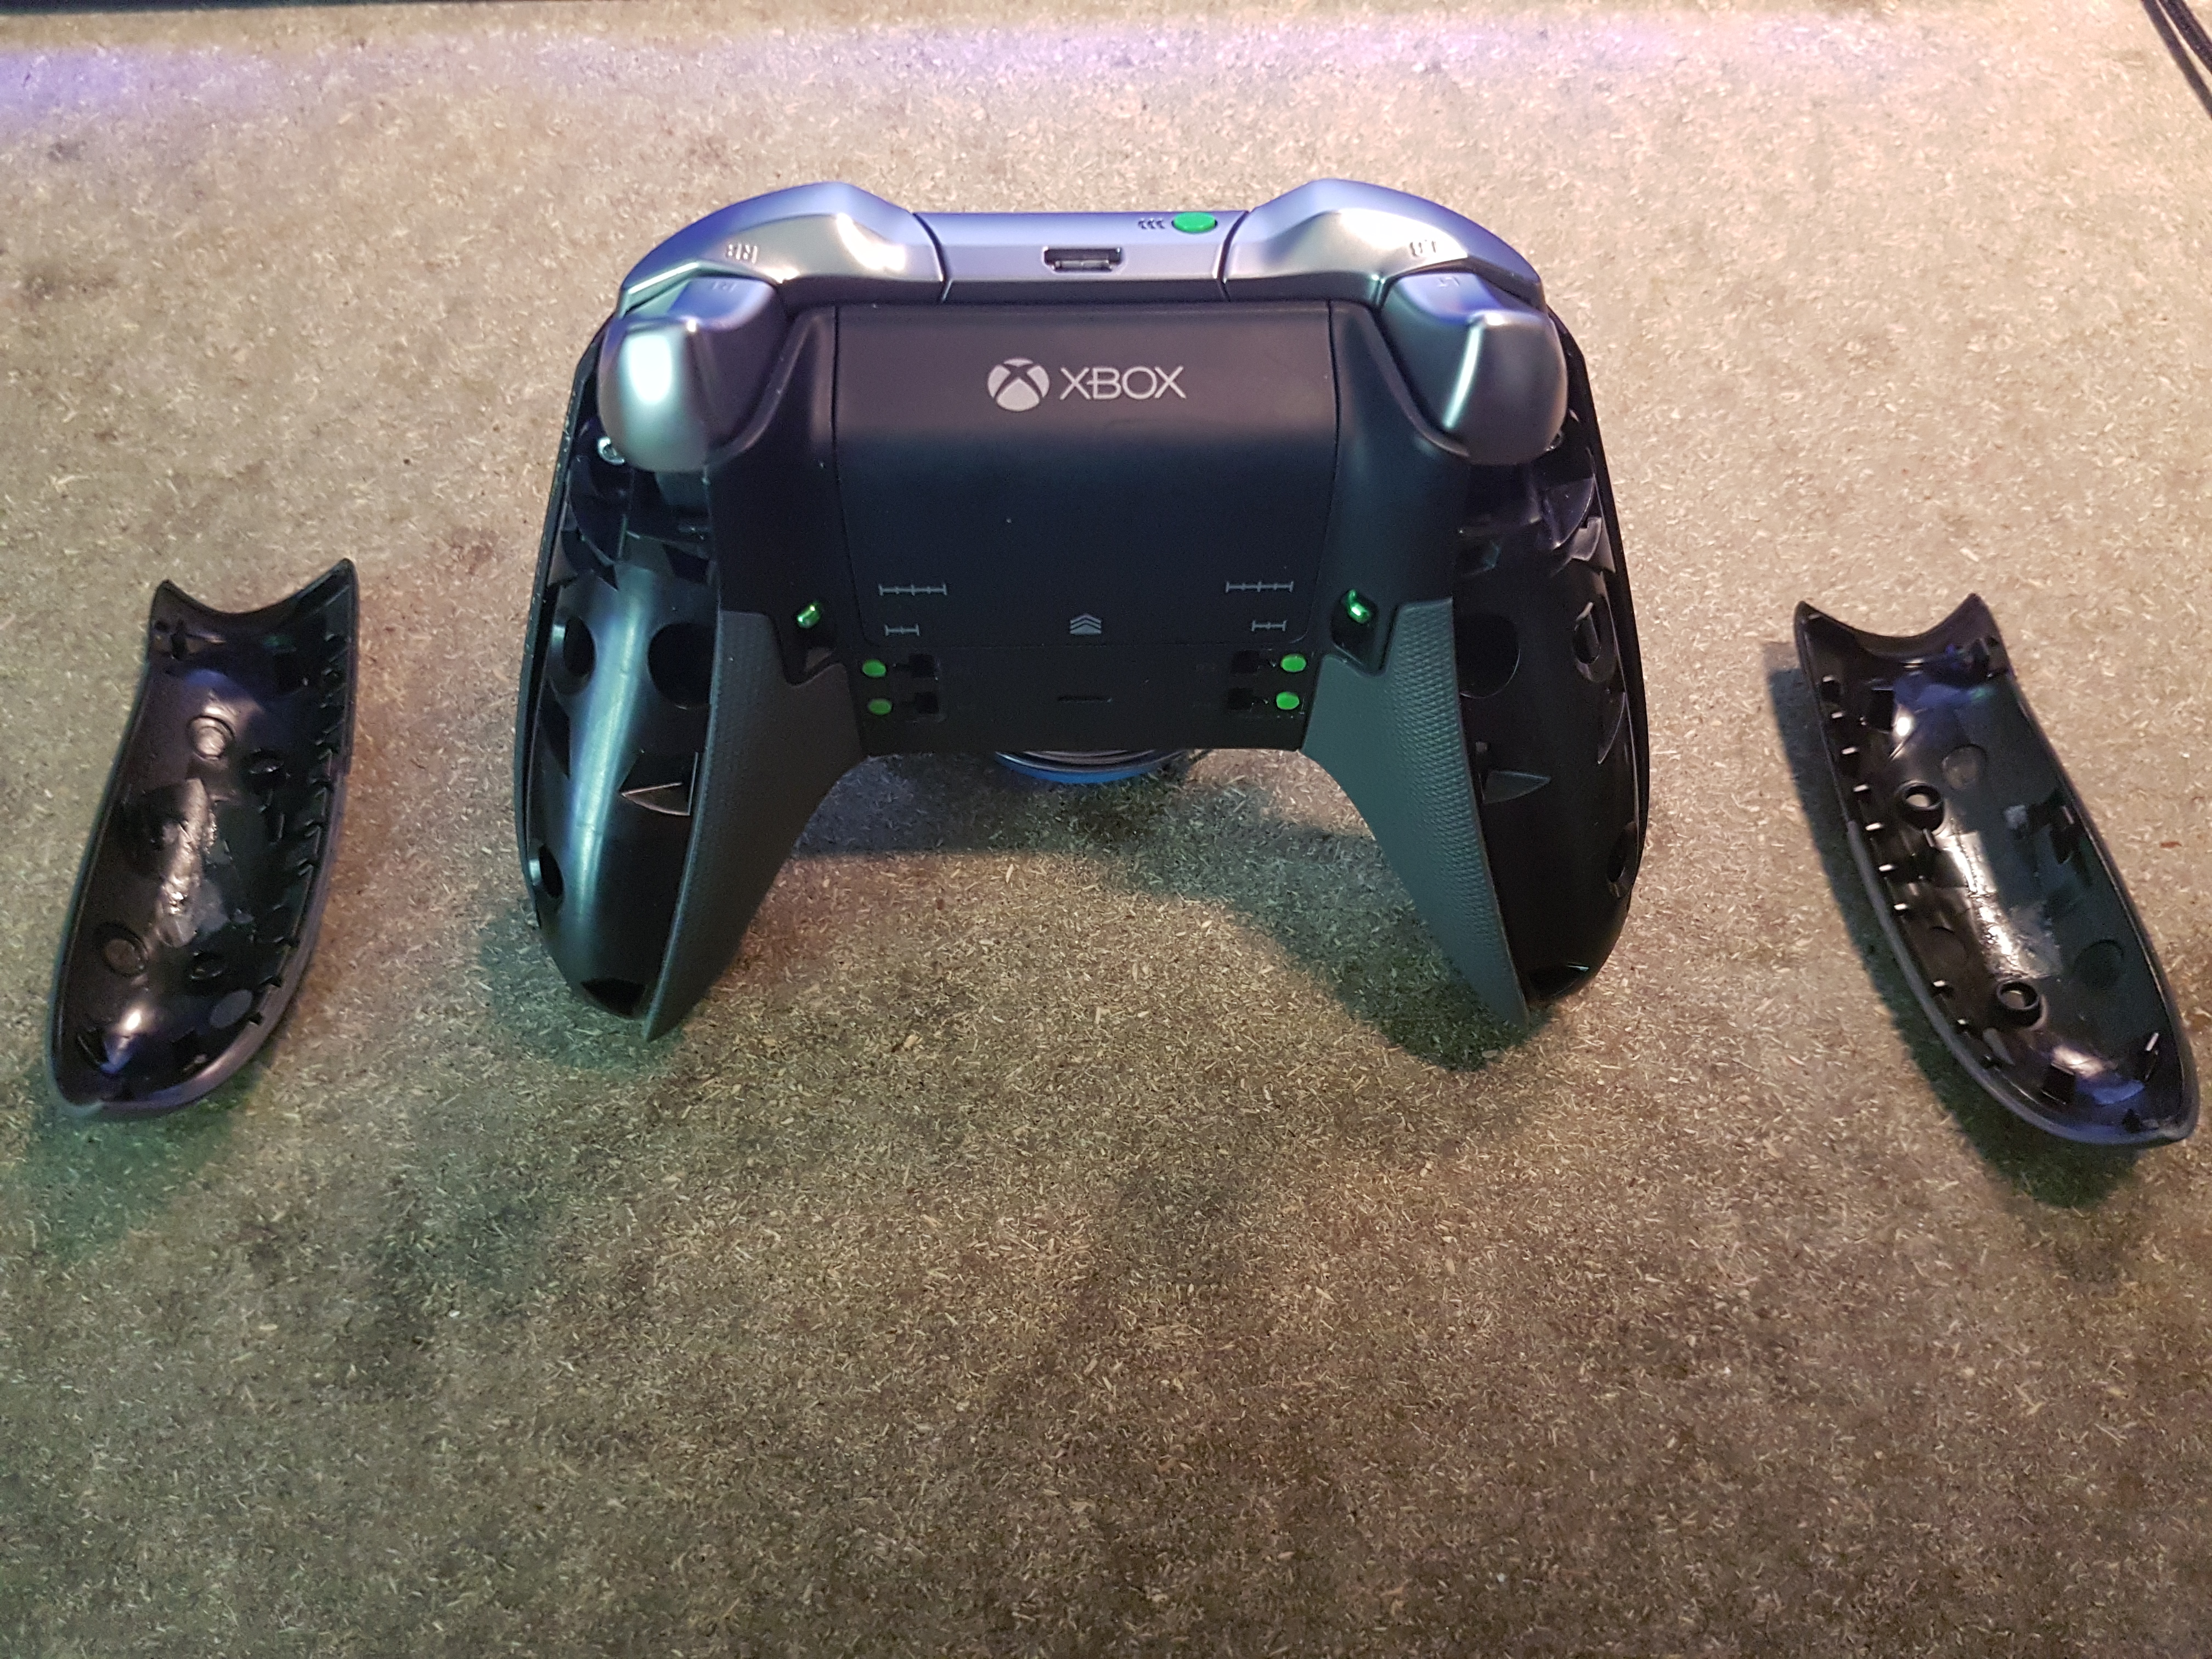
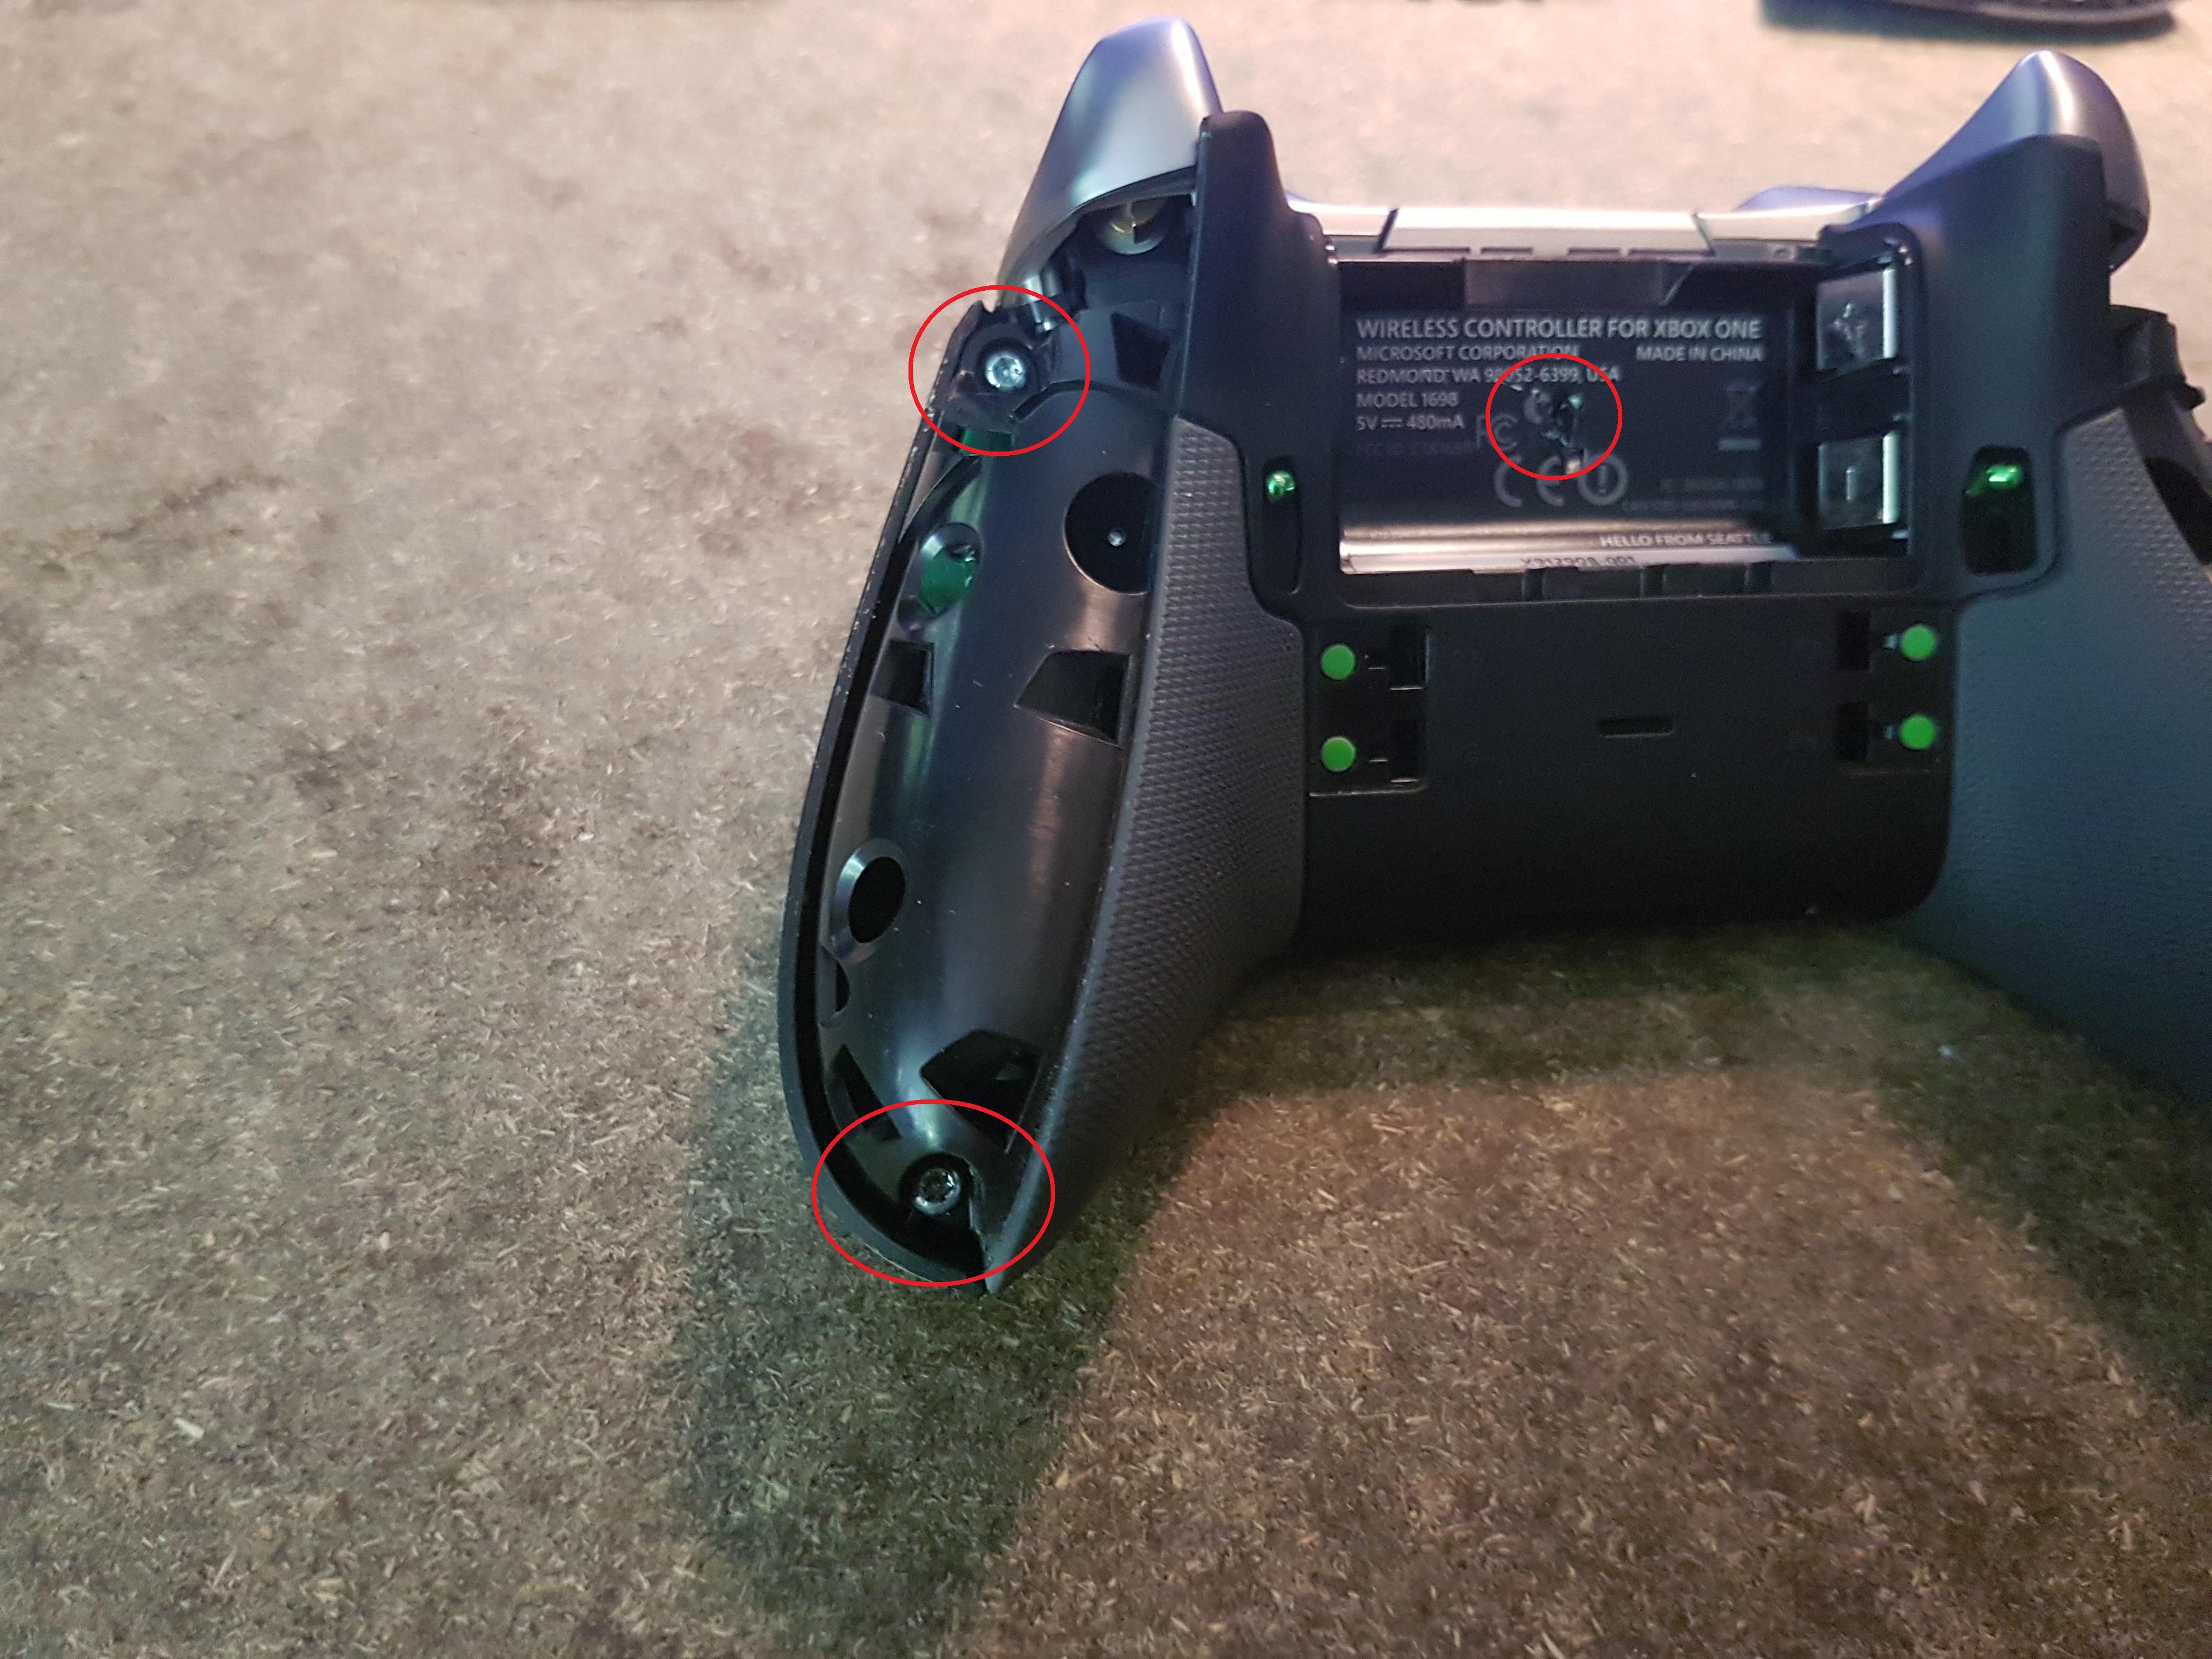
Remove the side covers
Those side covers are hiding some screws, so we need to take them off to start with. You want to gently pry them open from the side, and work your way around. I did it with my nails, but some others used credit cards or opening tools. They should come off themselves pretty easily. Don't forget to:
- Remove the battery
- Remove the joystick pads
- Remove the arrow pad.
Little note: there a little adhesive strap inside to help them stay in place.
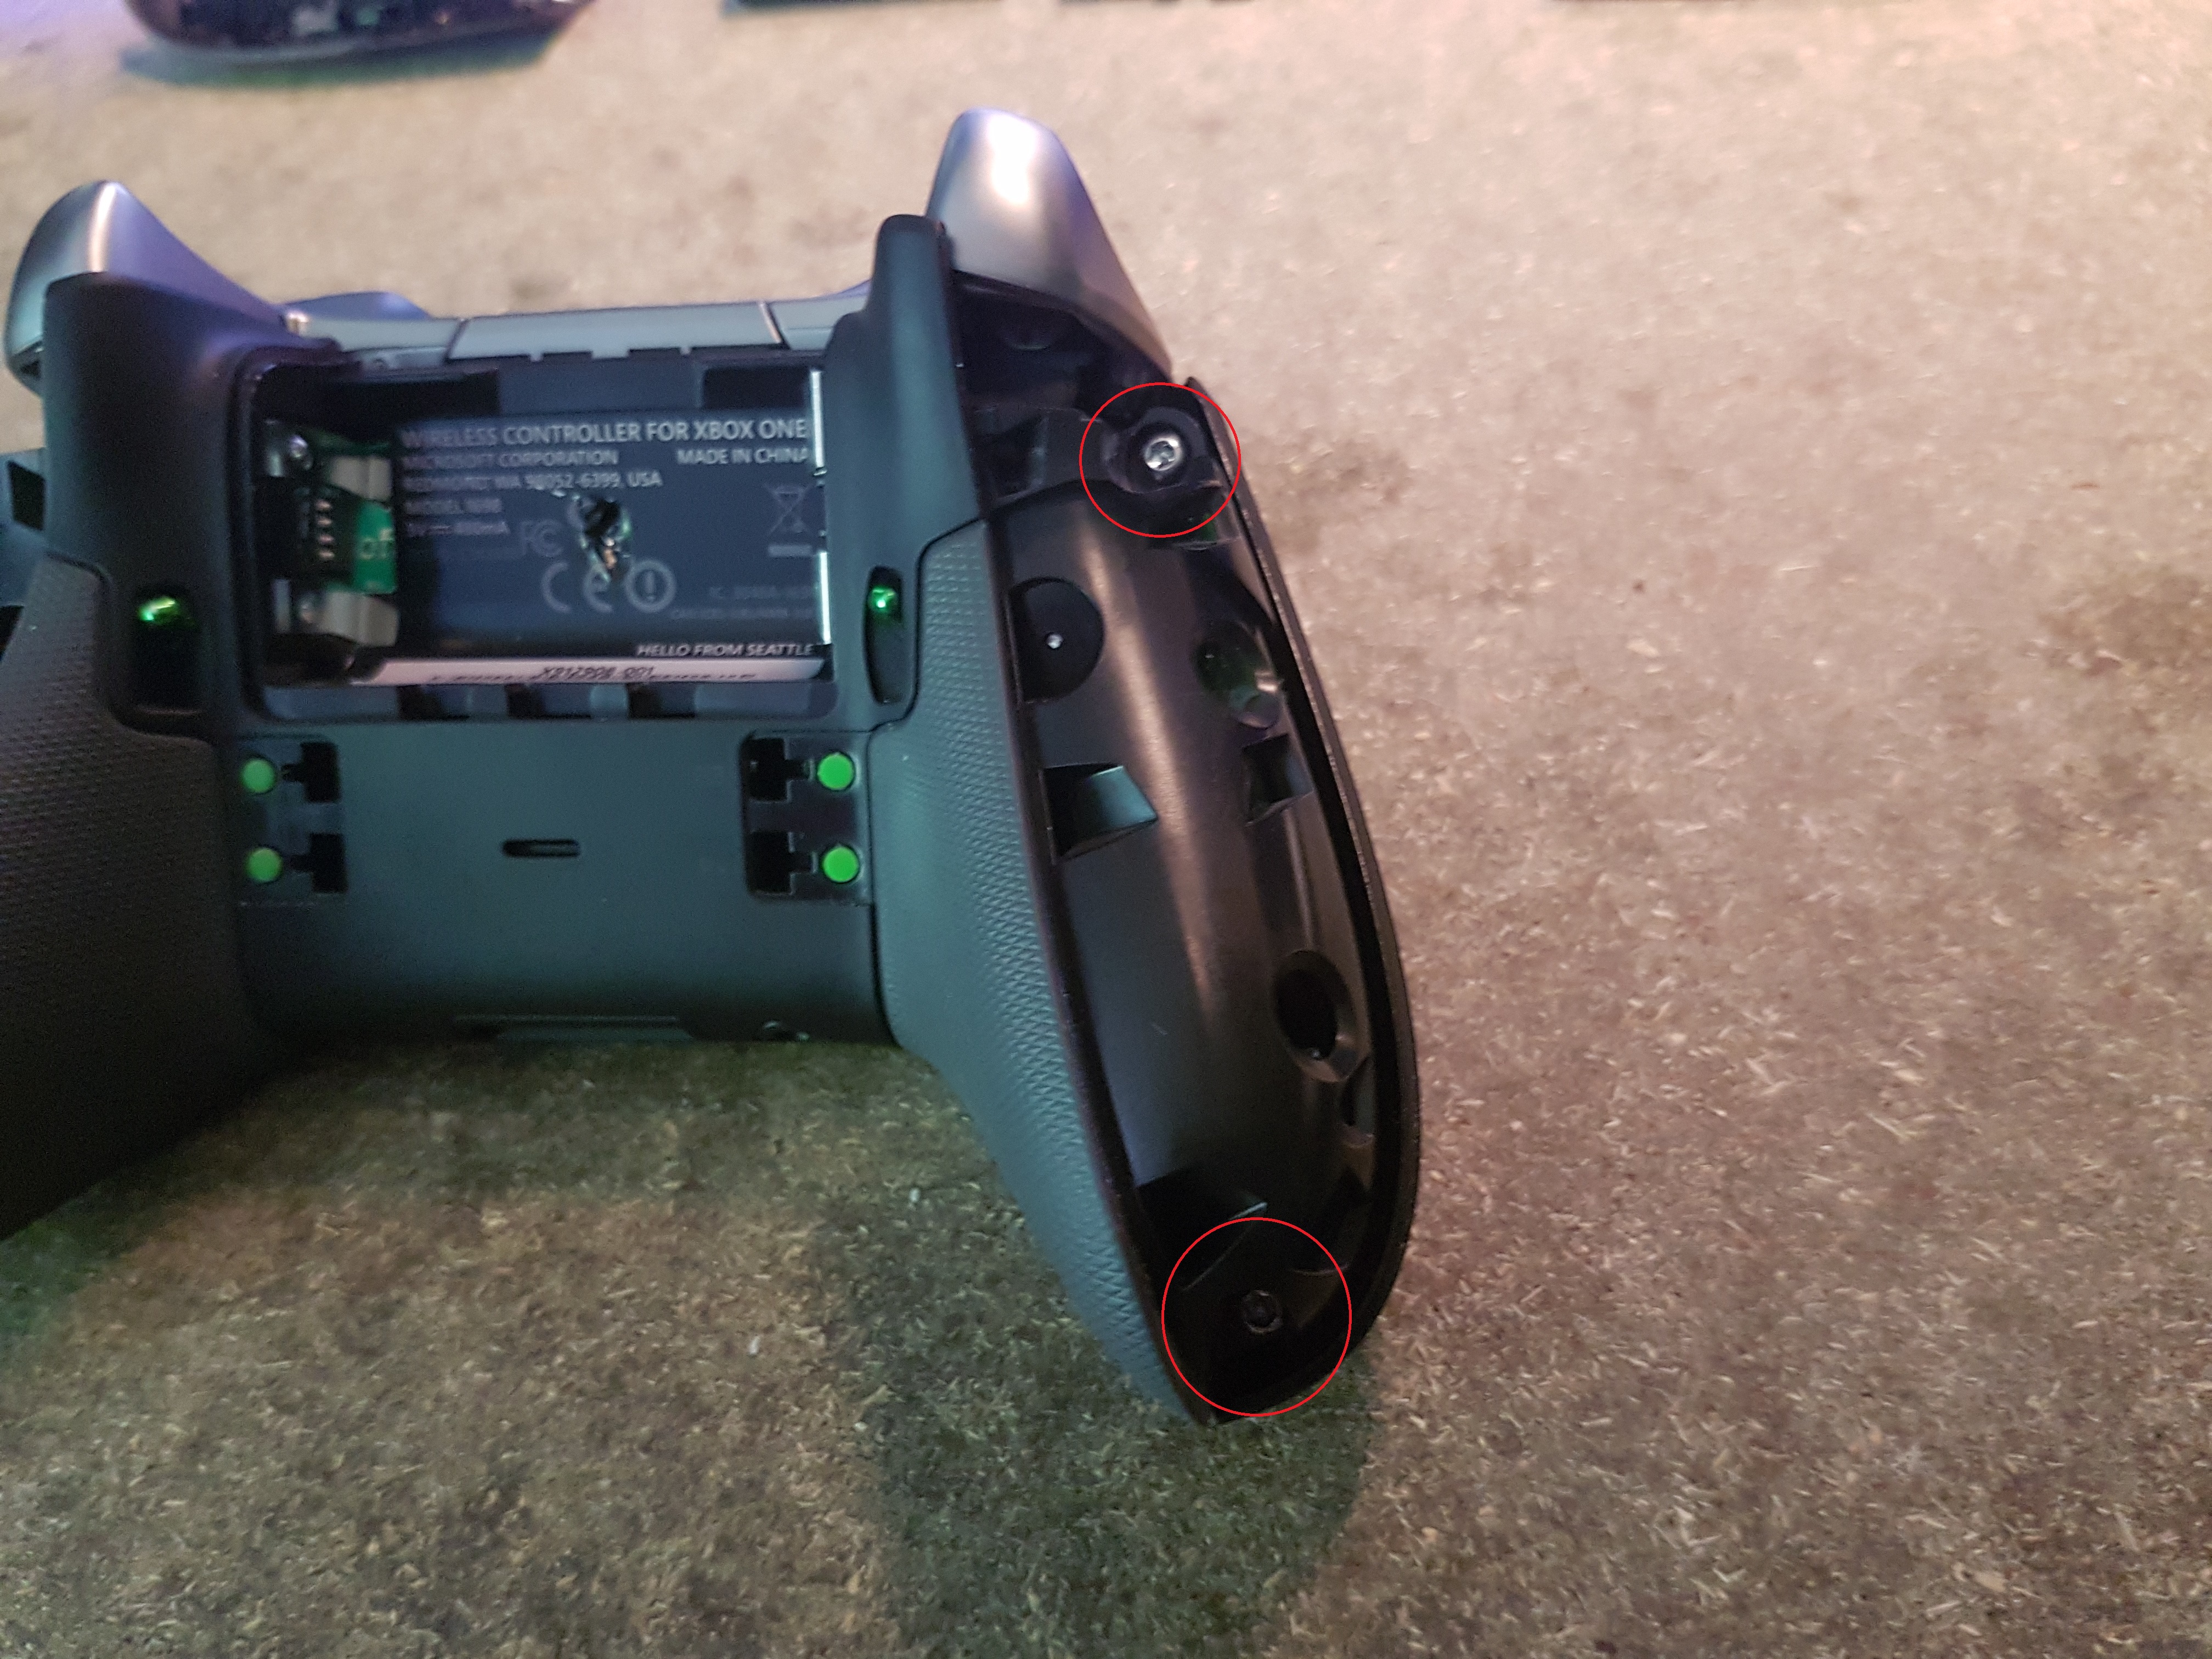
Remove the screws
Using the Torx TR8 screw driver, remove the 5 screws holding the front and back panel together. The fifth one, as indicated, is hidden behind the official sticker, so, by unscrewing it, you're effectively voiding your warranty.
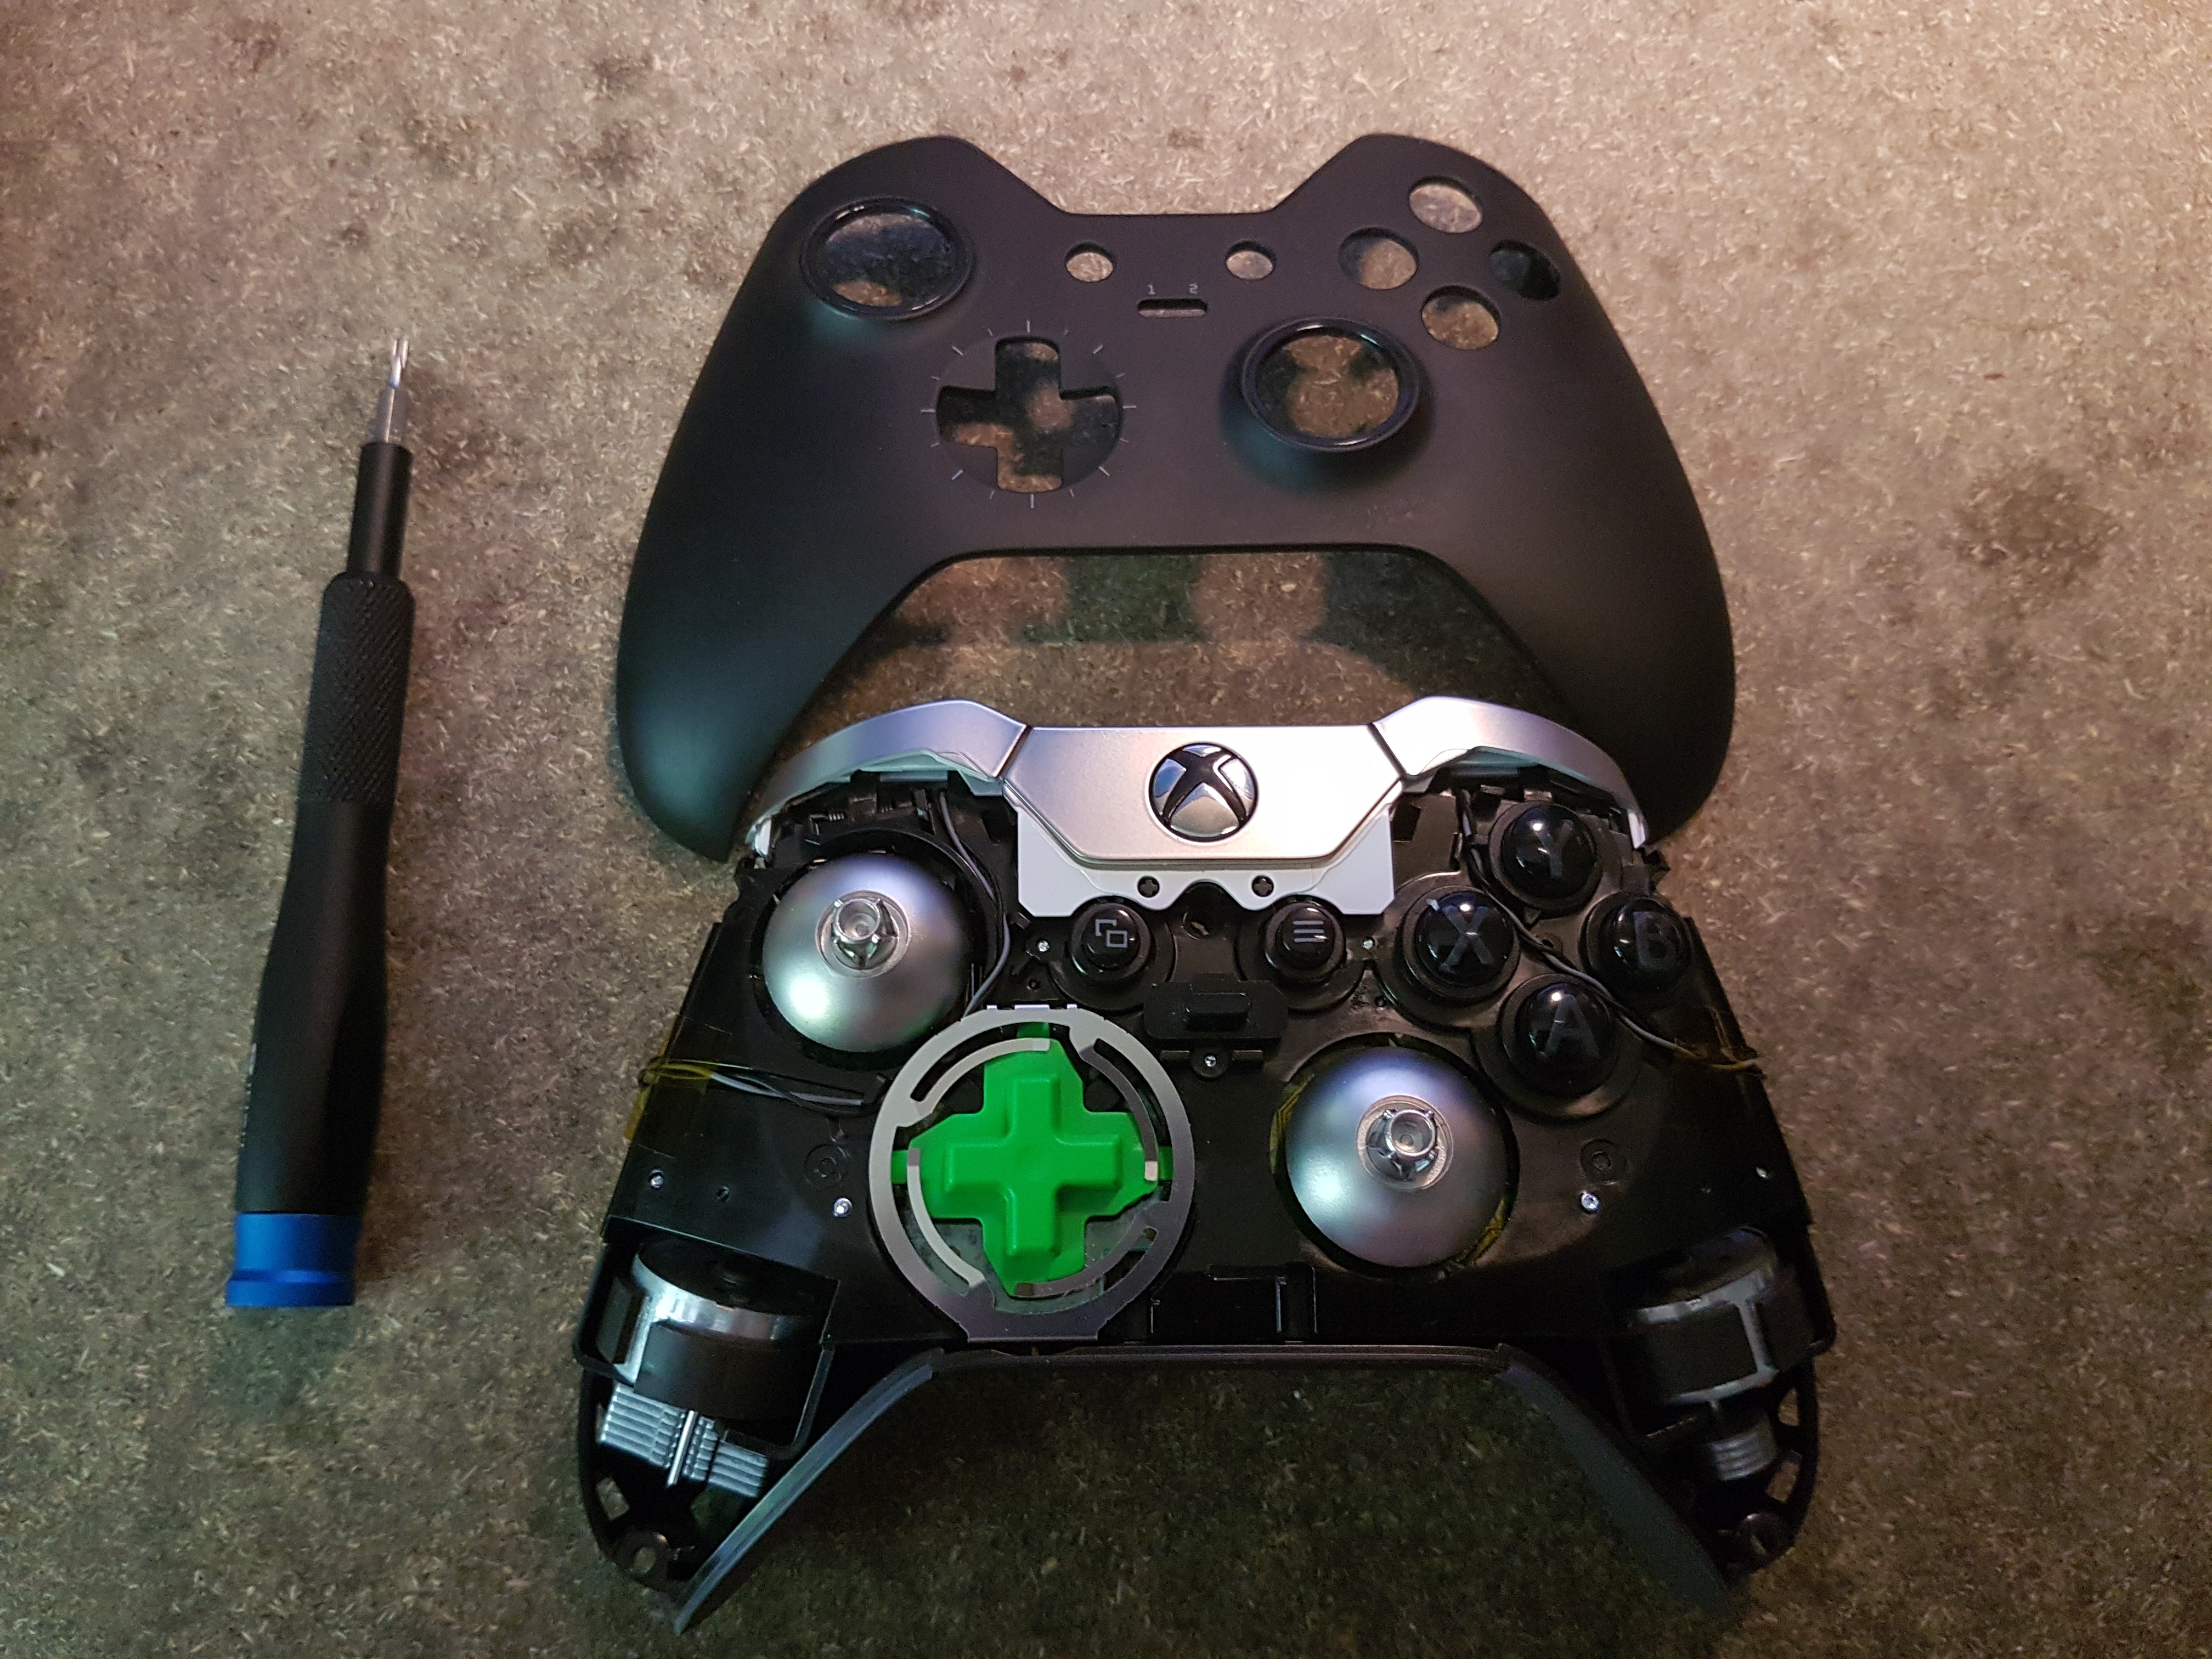
Now that you've done this, the front panel should come off on its own, with literally no help. Please take care of removing the "profile selector" button (the one right in the middle of the controller), or it will fall off at the next step and you might loose it.
Removing the back panel
First, before removing the back panel, you must take off your joystick adapters. Those should come off easily by gently pulling them.
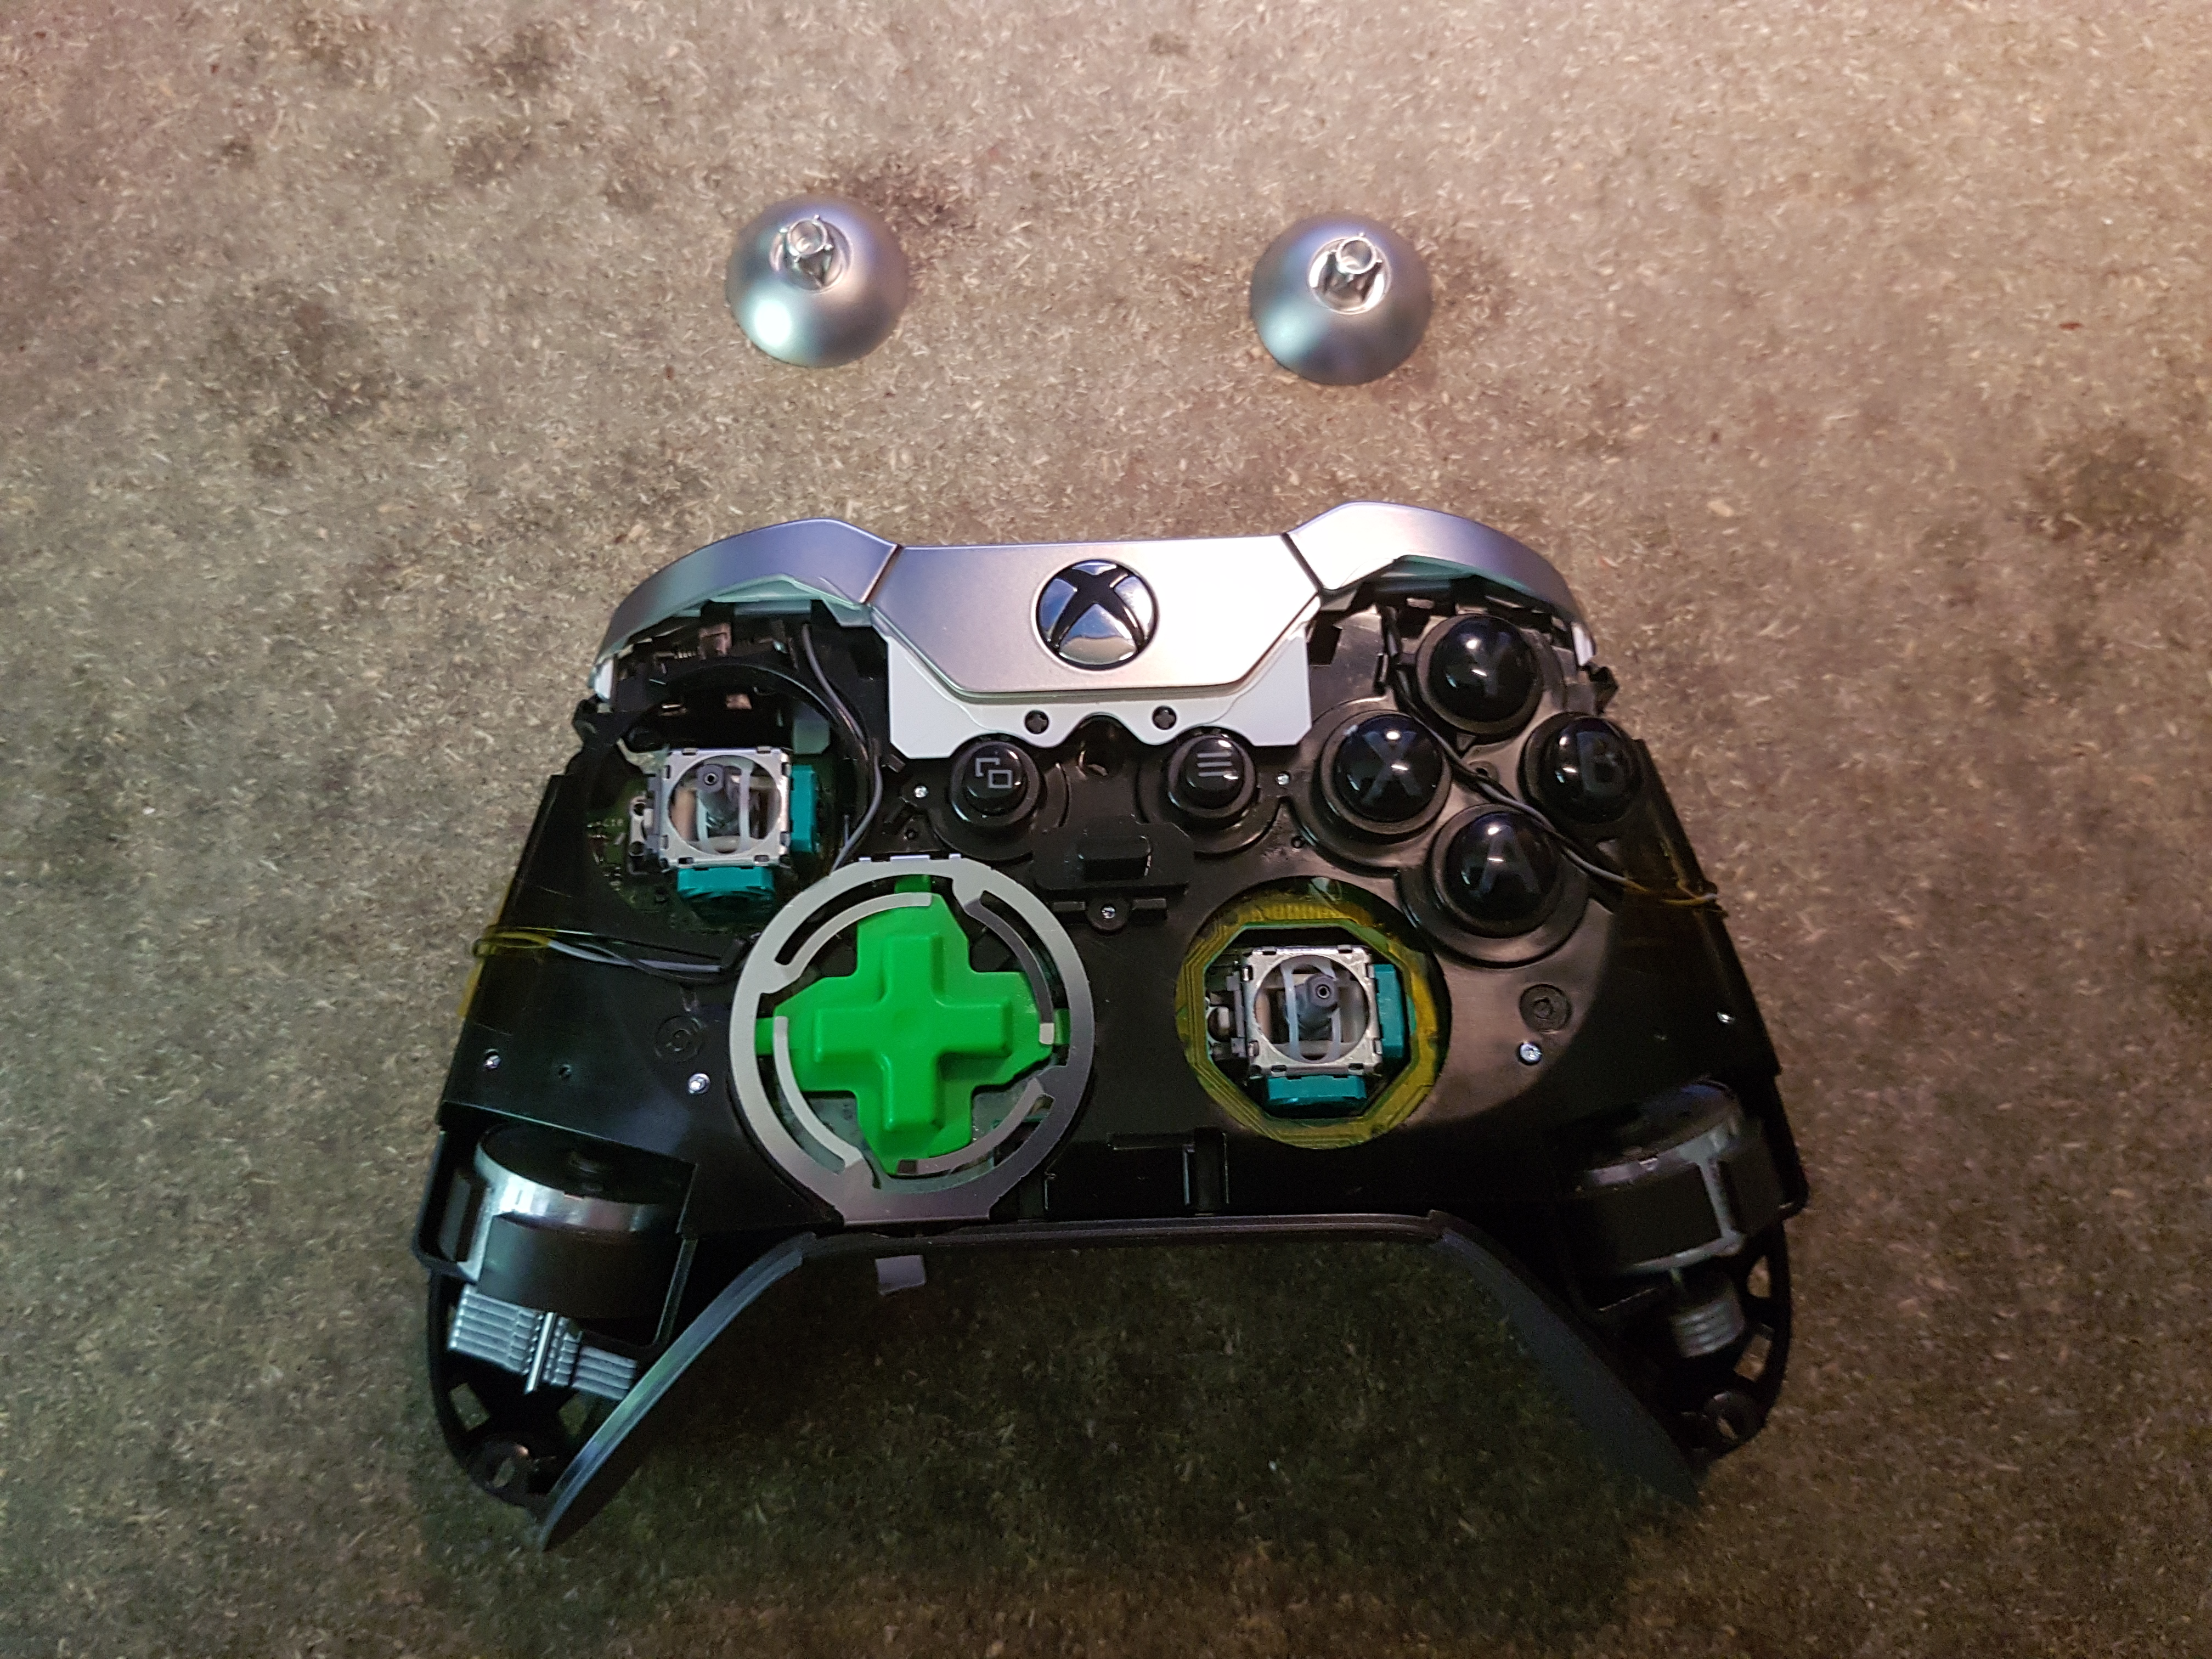
Just a side note, look at the joystick components: they are from ALPS, probably the RKJXV1224005, and are usually high quality. Thumbs up for putting good components in there. Also, as they are standard, they are easy to find and order, in case you need a replacement.
Now let's work around the back panel. Before starting, you must know that there is a ribbon cable running from the back panel to a PCB in the middle frame. So don't be too violent during this part or you might break the ribbon. This ribbon is used to carry the signals from the 4 optional buttons under the controller, so if you're repairing a standard Xbox controller, just forget about it.
Now, that said, let's remove that back panel. Please note that it's a bit harder than the front panel..
- Start by gently lifting the back panel from the top of the controller. By top, i mean the side where the battery is.
- The microphone port that is kind of holding the panel in place. So you'll have to make the panel slip over it
- Again, be careful with the ribbon !
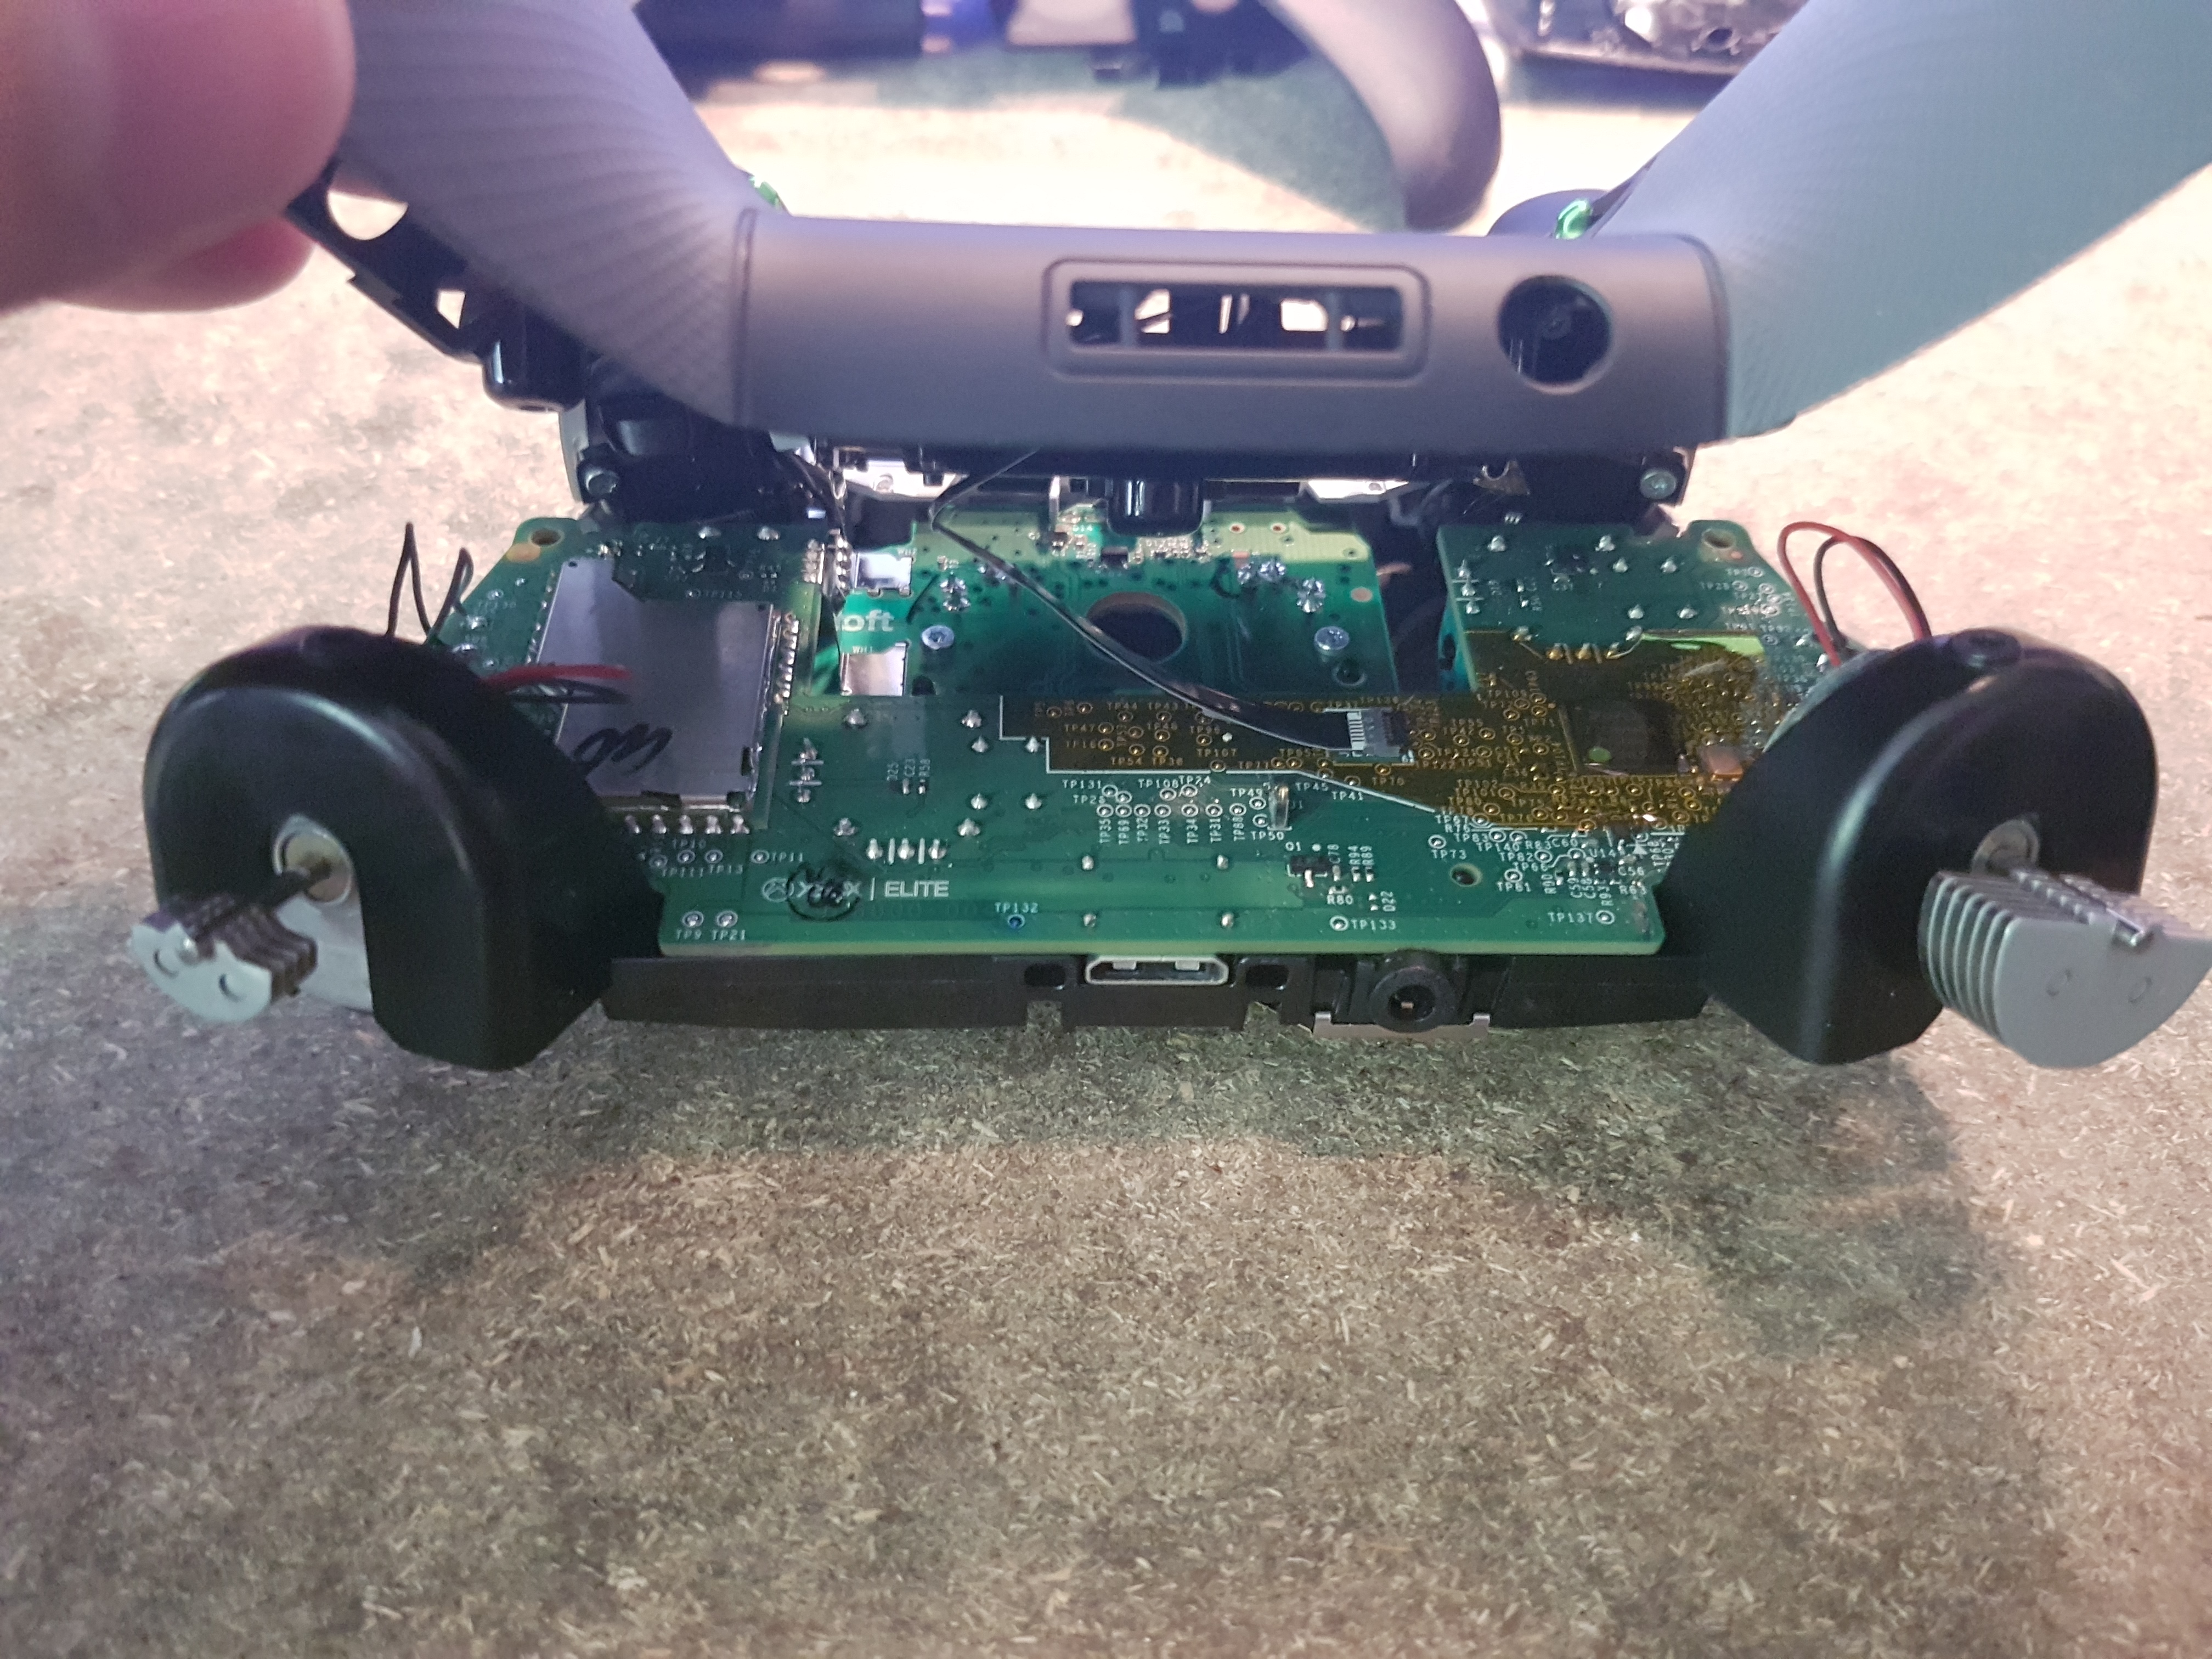
You should end up with something like the next picture.
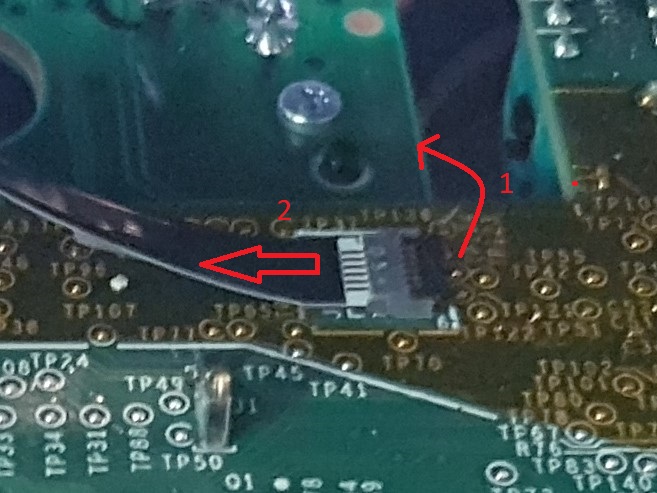
Now, we have to disconnect the ribbon. To do that, on the middle frame PCB, identify the little connector. Gently lift up the black part to free the ribbon, and pull it out of the connector.
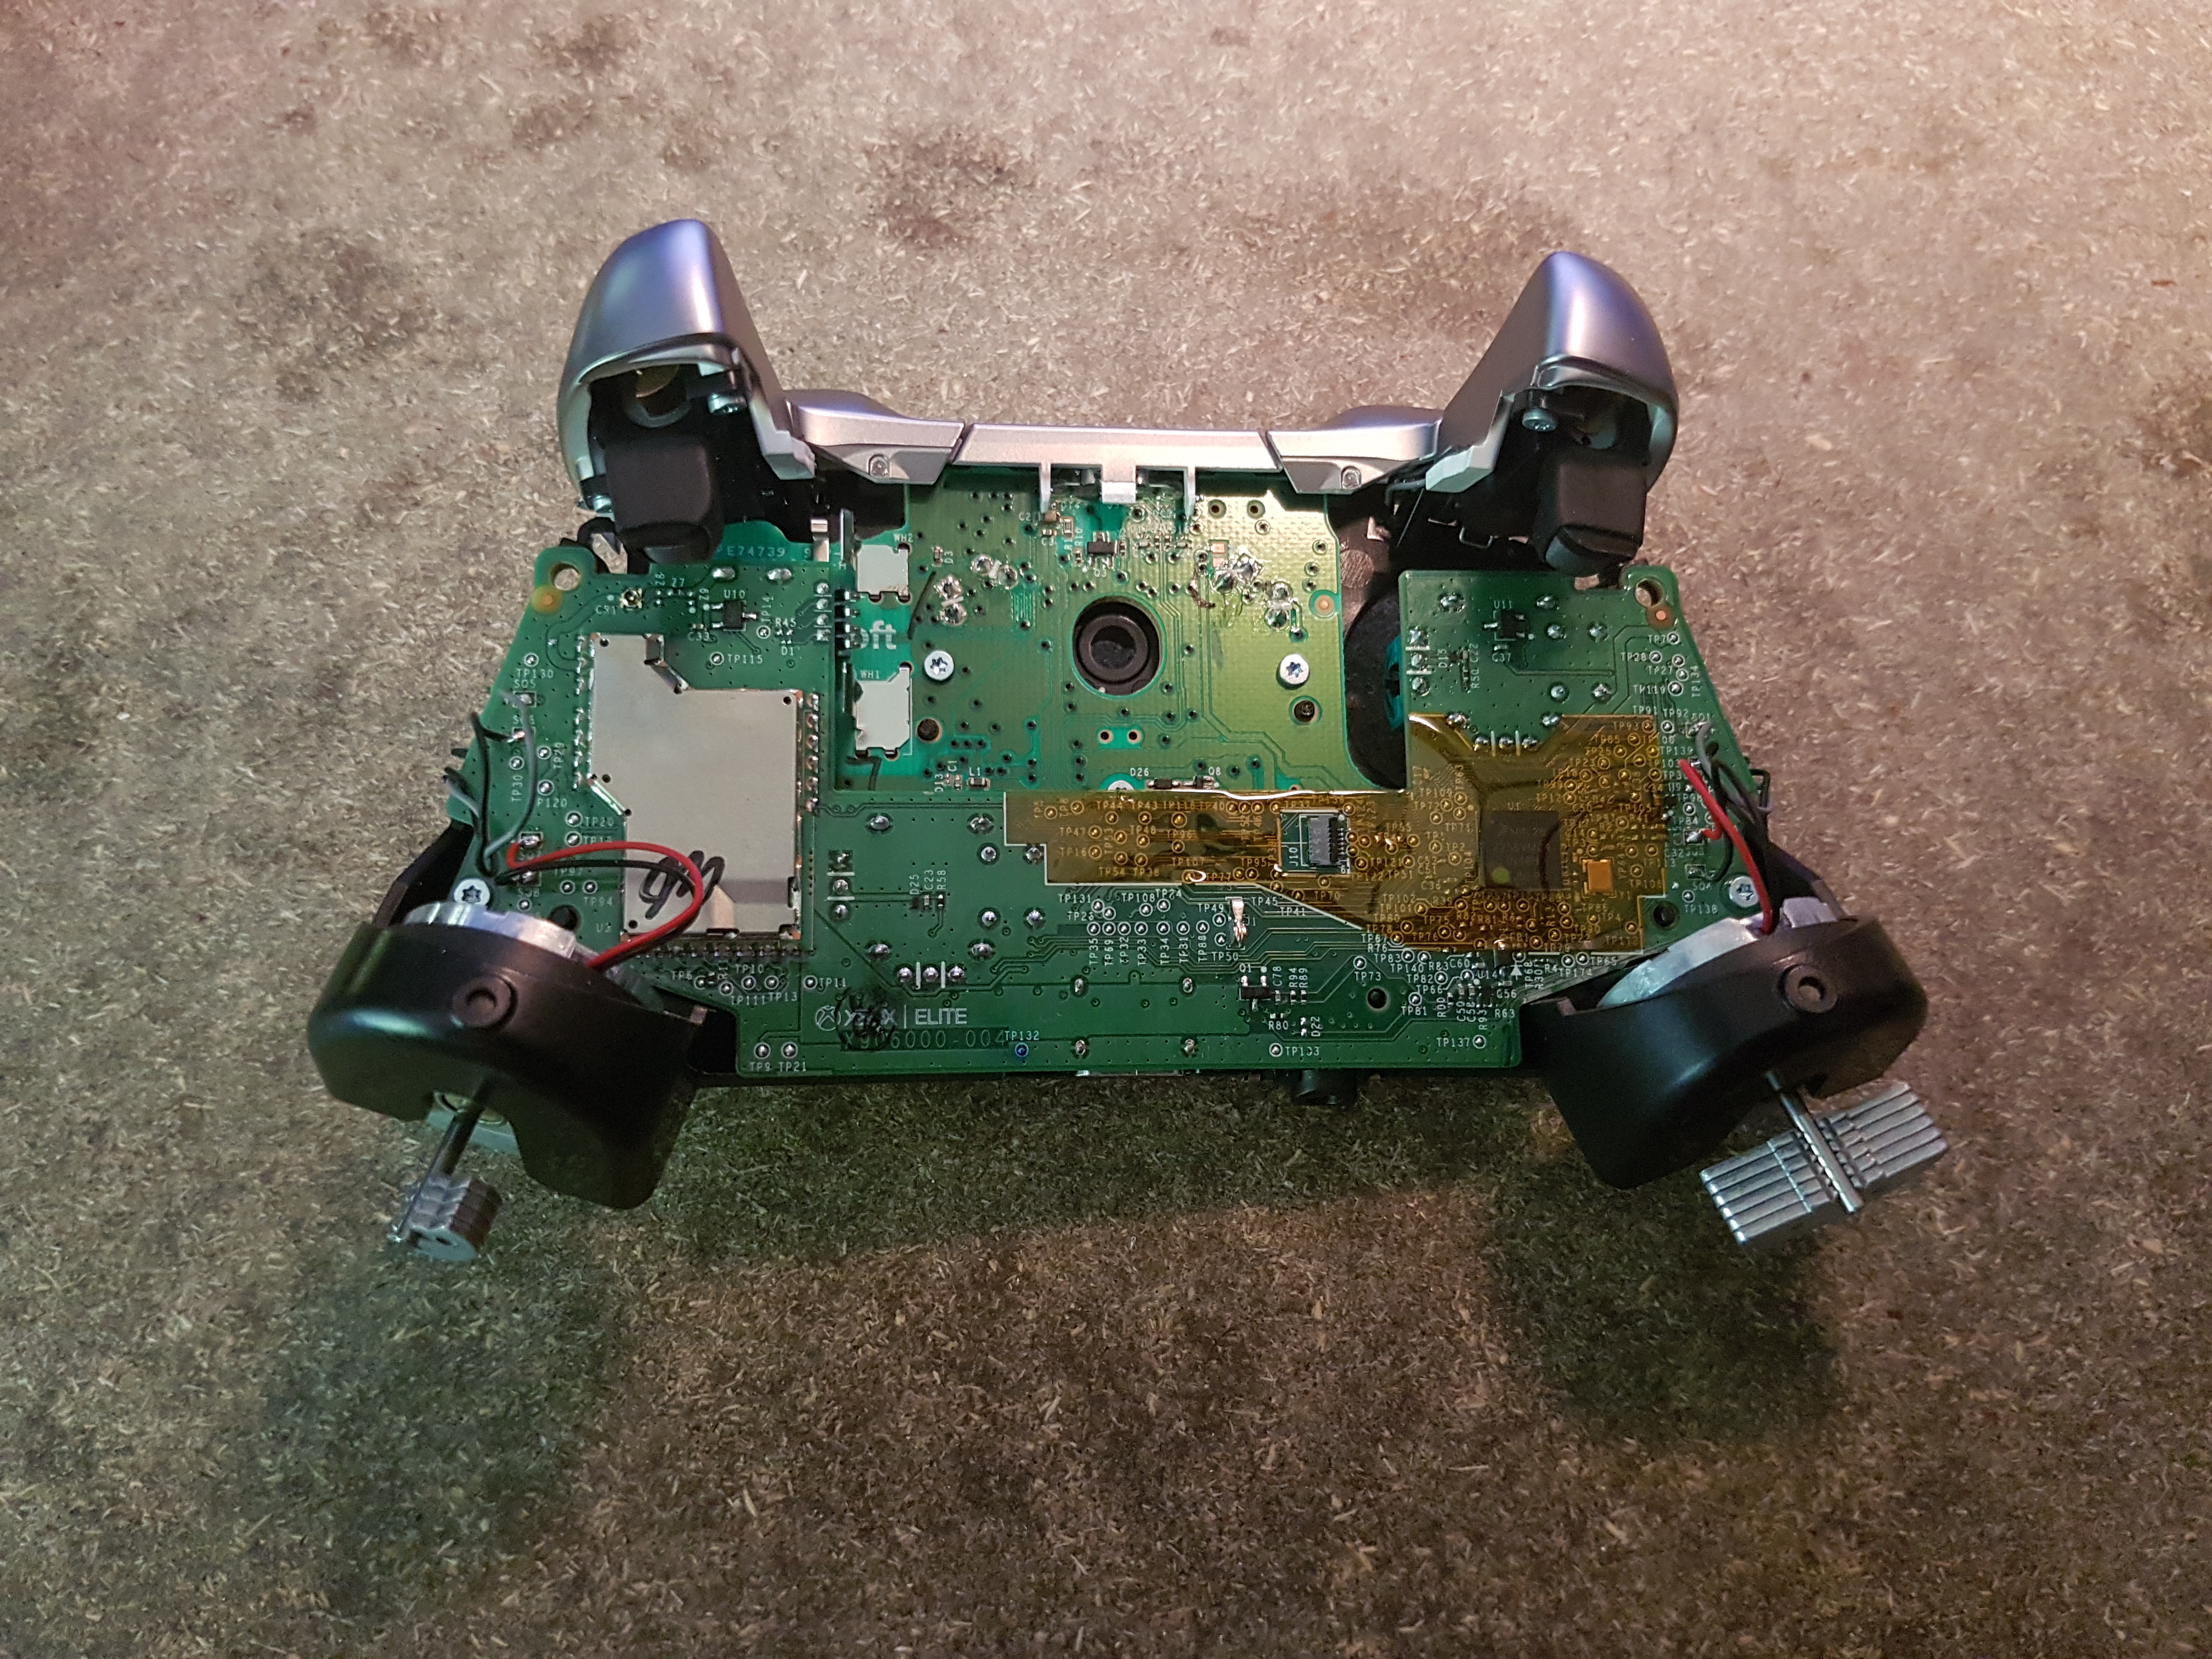
After removing the back panel, you should end up with your controller looking like this. Note that the vibration motors aren't attached to the middle frame, so they might fall off on their own. That's not a problem.
Removing the top assembly
The top assembly includes the LB and RB buttons and the center plastic part which goes around the Xbox button. This part is also fragile, like many parts in this controller, so please be gentle with it. From the "buttons" side of the controller, you'll see that the middle plastic part has two holes, which helps it stay in place, and so does the Xbox button.
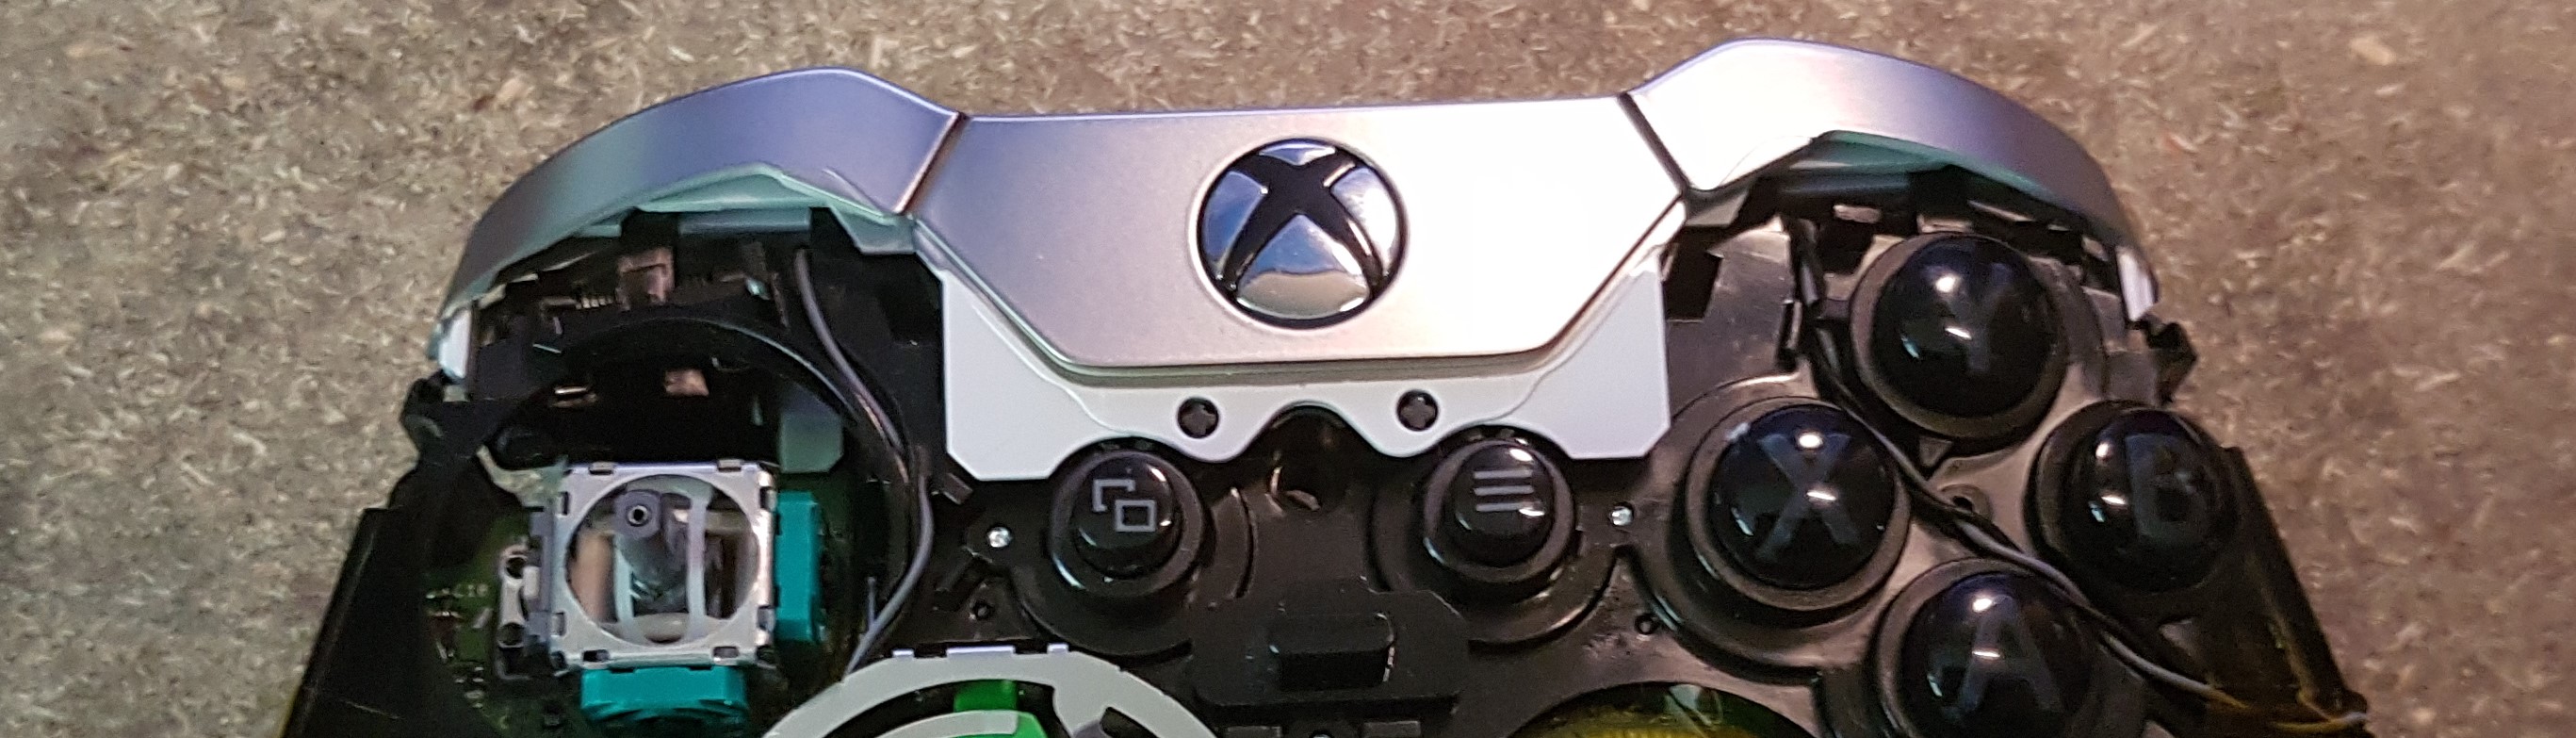
To remove it, lift the plastic part between the two hole, push the Xbox button, and try to make the plastic part slip over it. Once done, the whole contraption should come off as easily as the front panel
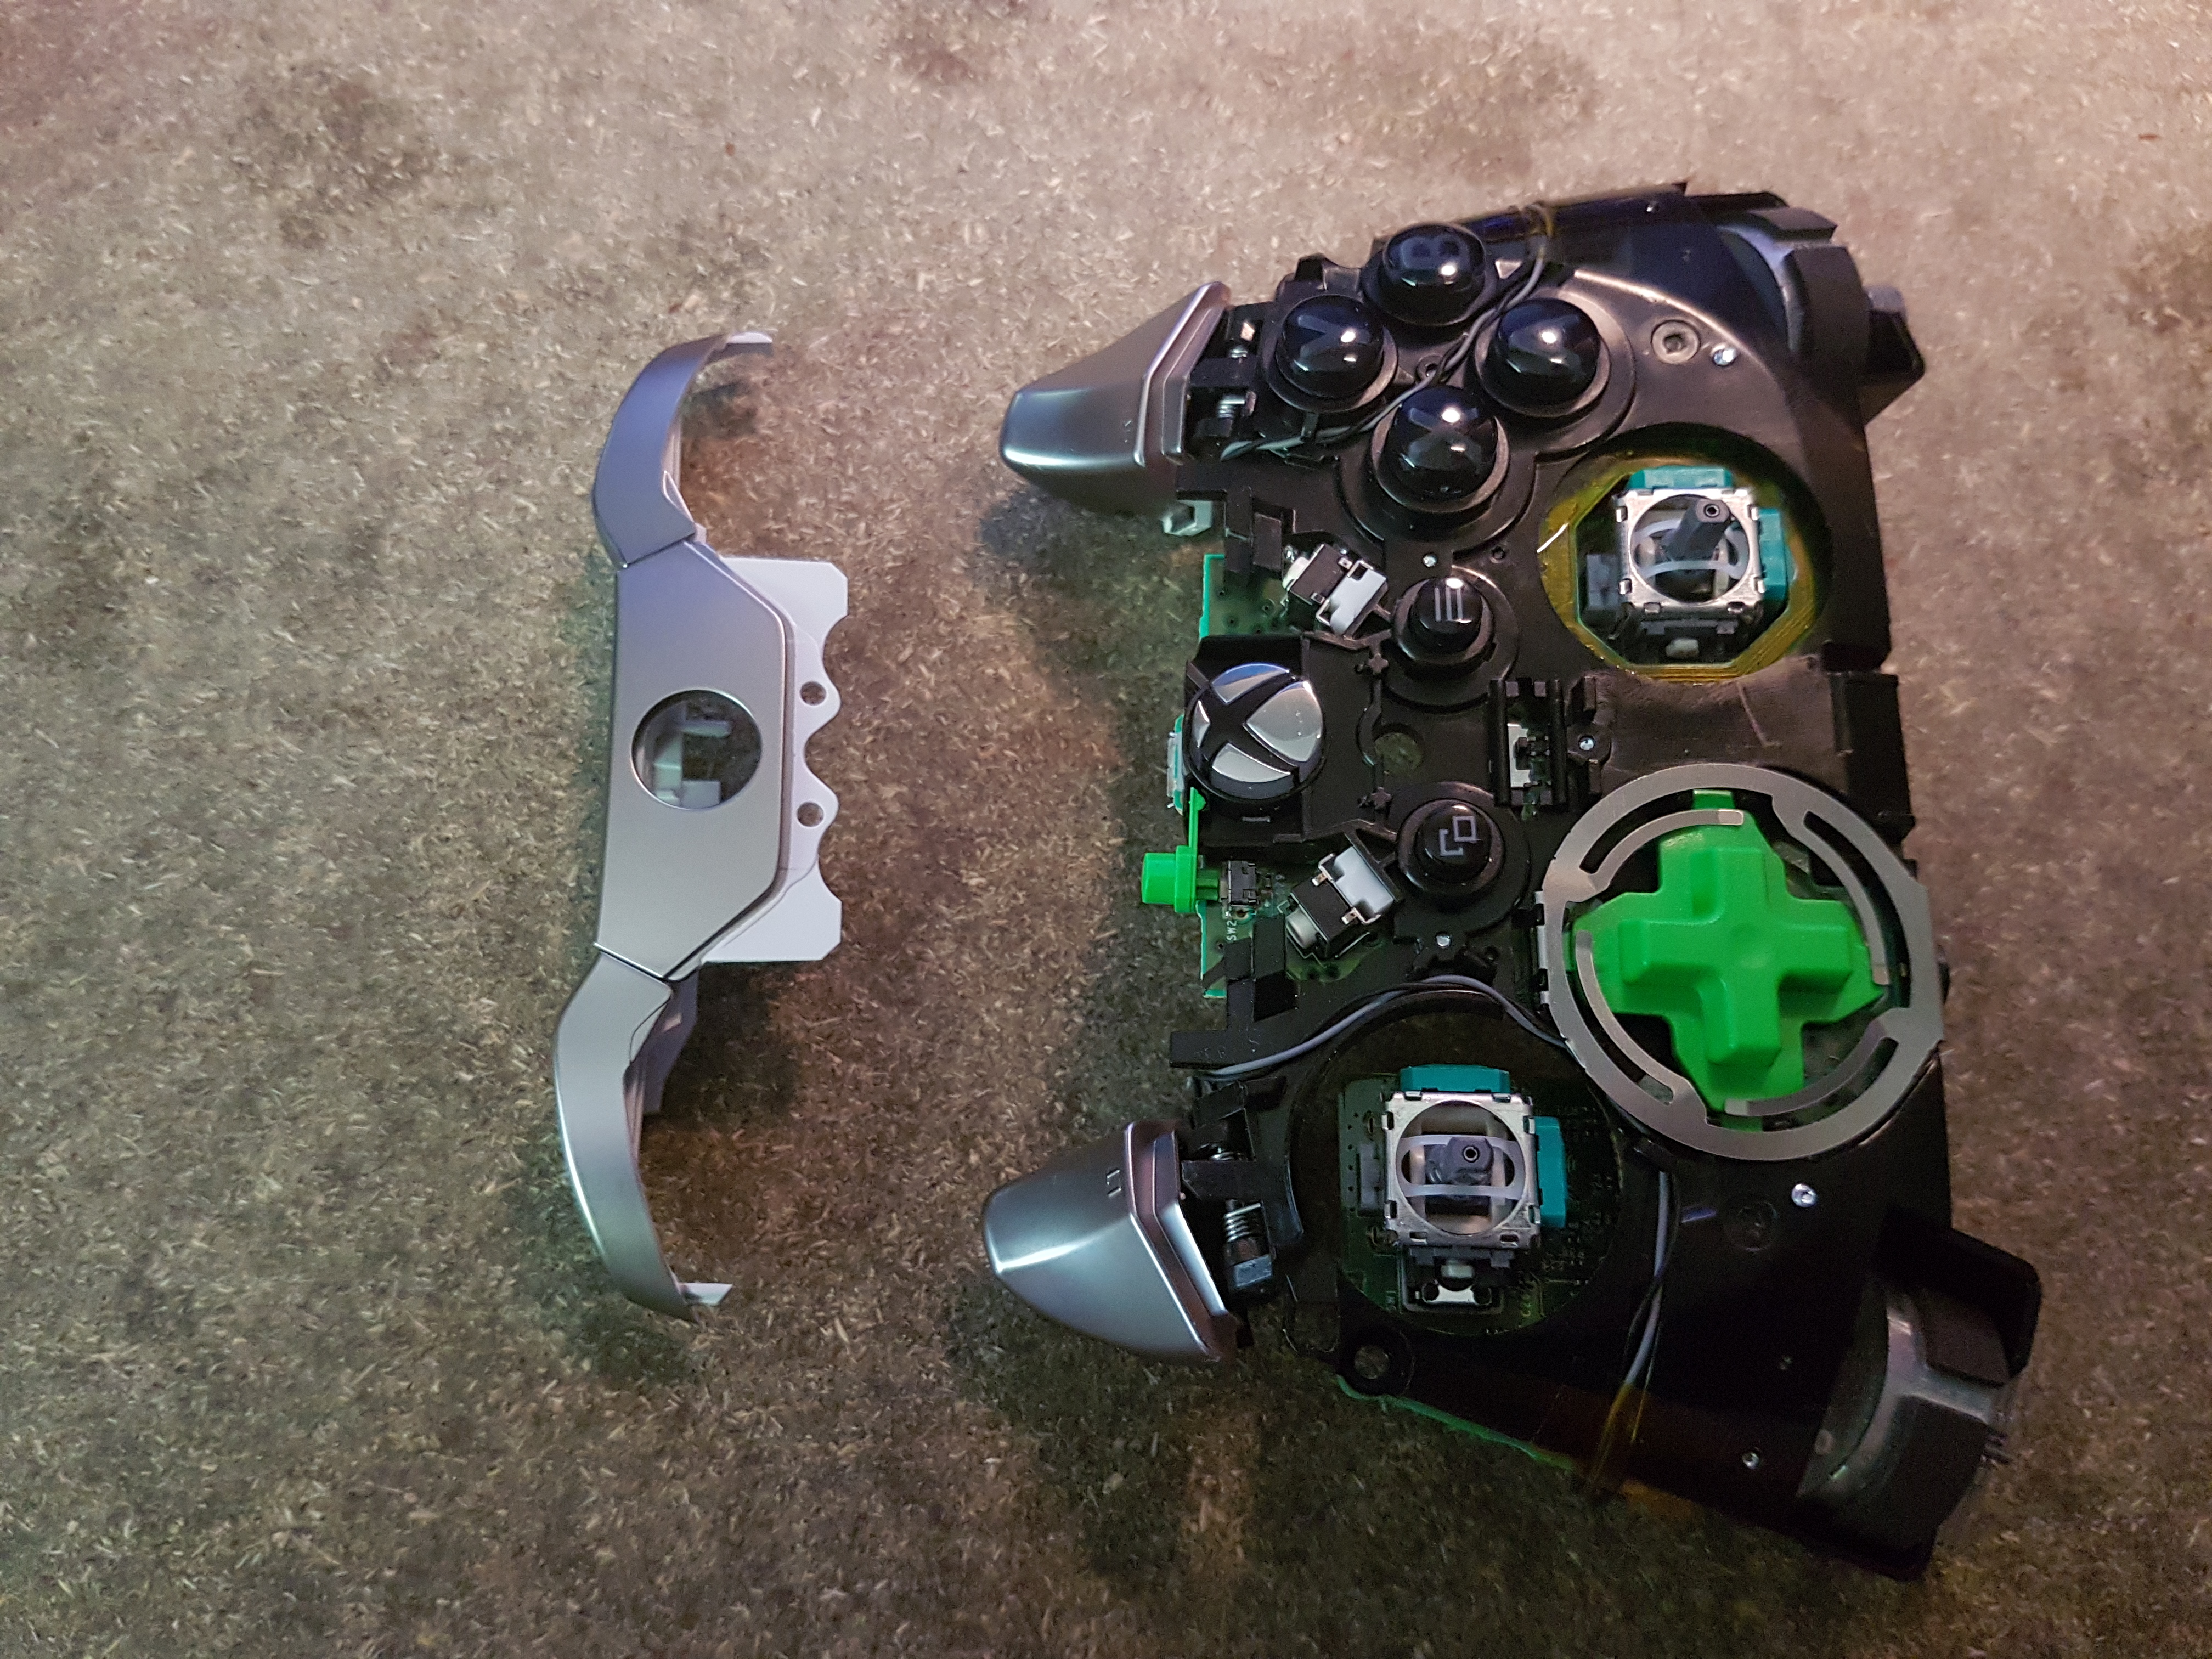
If you look at how the LB and RB button works, you'll see that they have a little wing that goes in between two black plastic guides before hitting the actual button. Remember this when you'll reassemble your controller, because if you don't make the little wings go between the guides, they'll break or you won't be able you use these buttons.

You'll also have to remove the sync button (the green button in the middle, in the above picture). If you don't, it will fall off when we'll remove the last PCB, and you might loose it. Now you should end up with your controller looking like this:
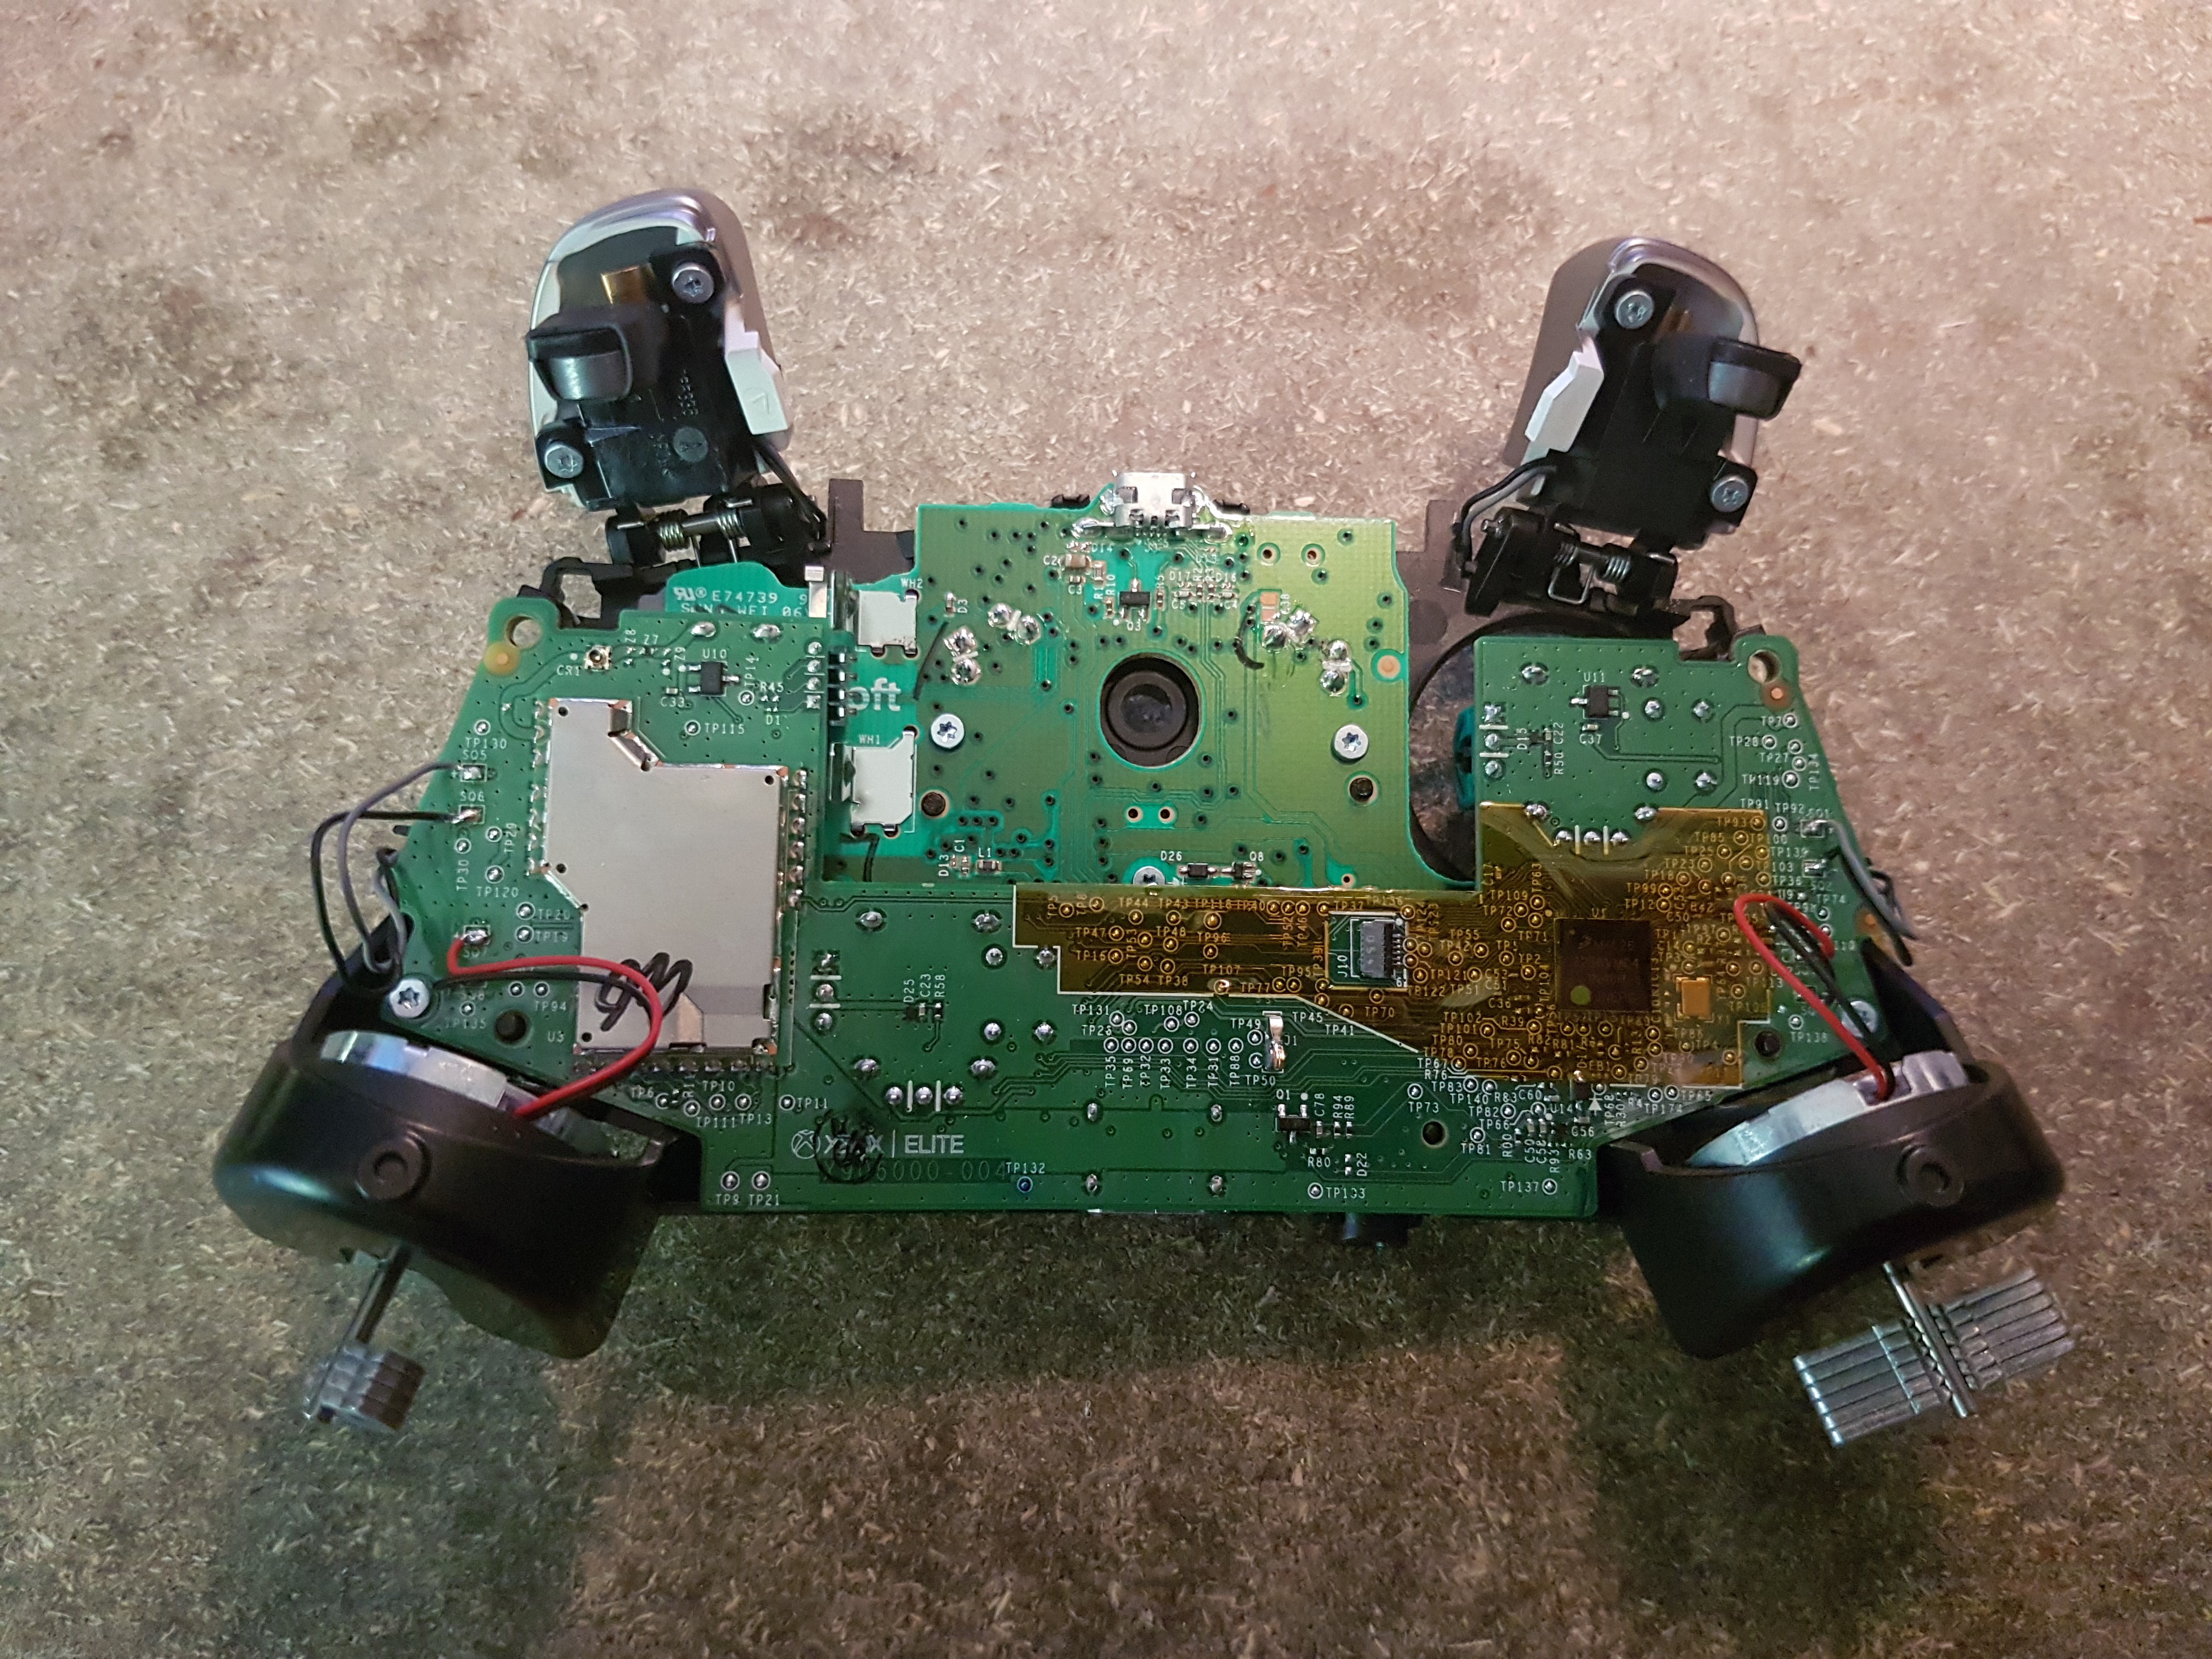
Removing the first PCB
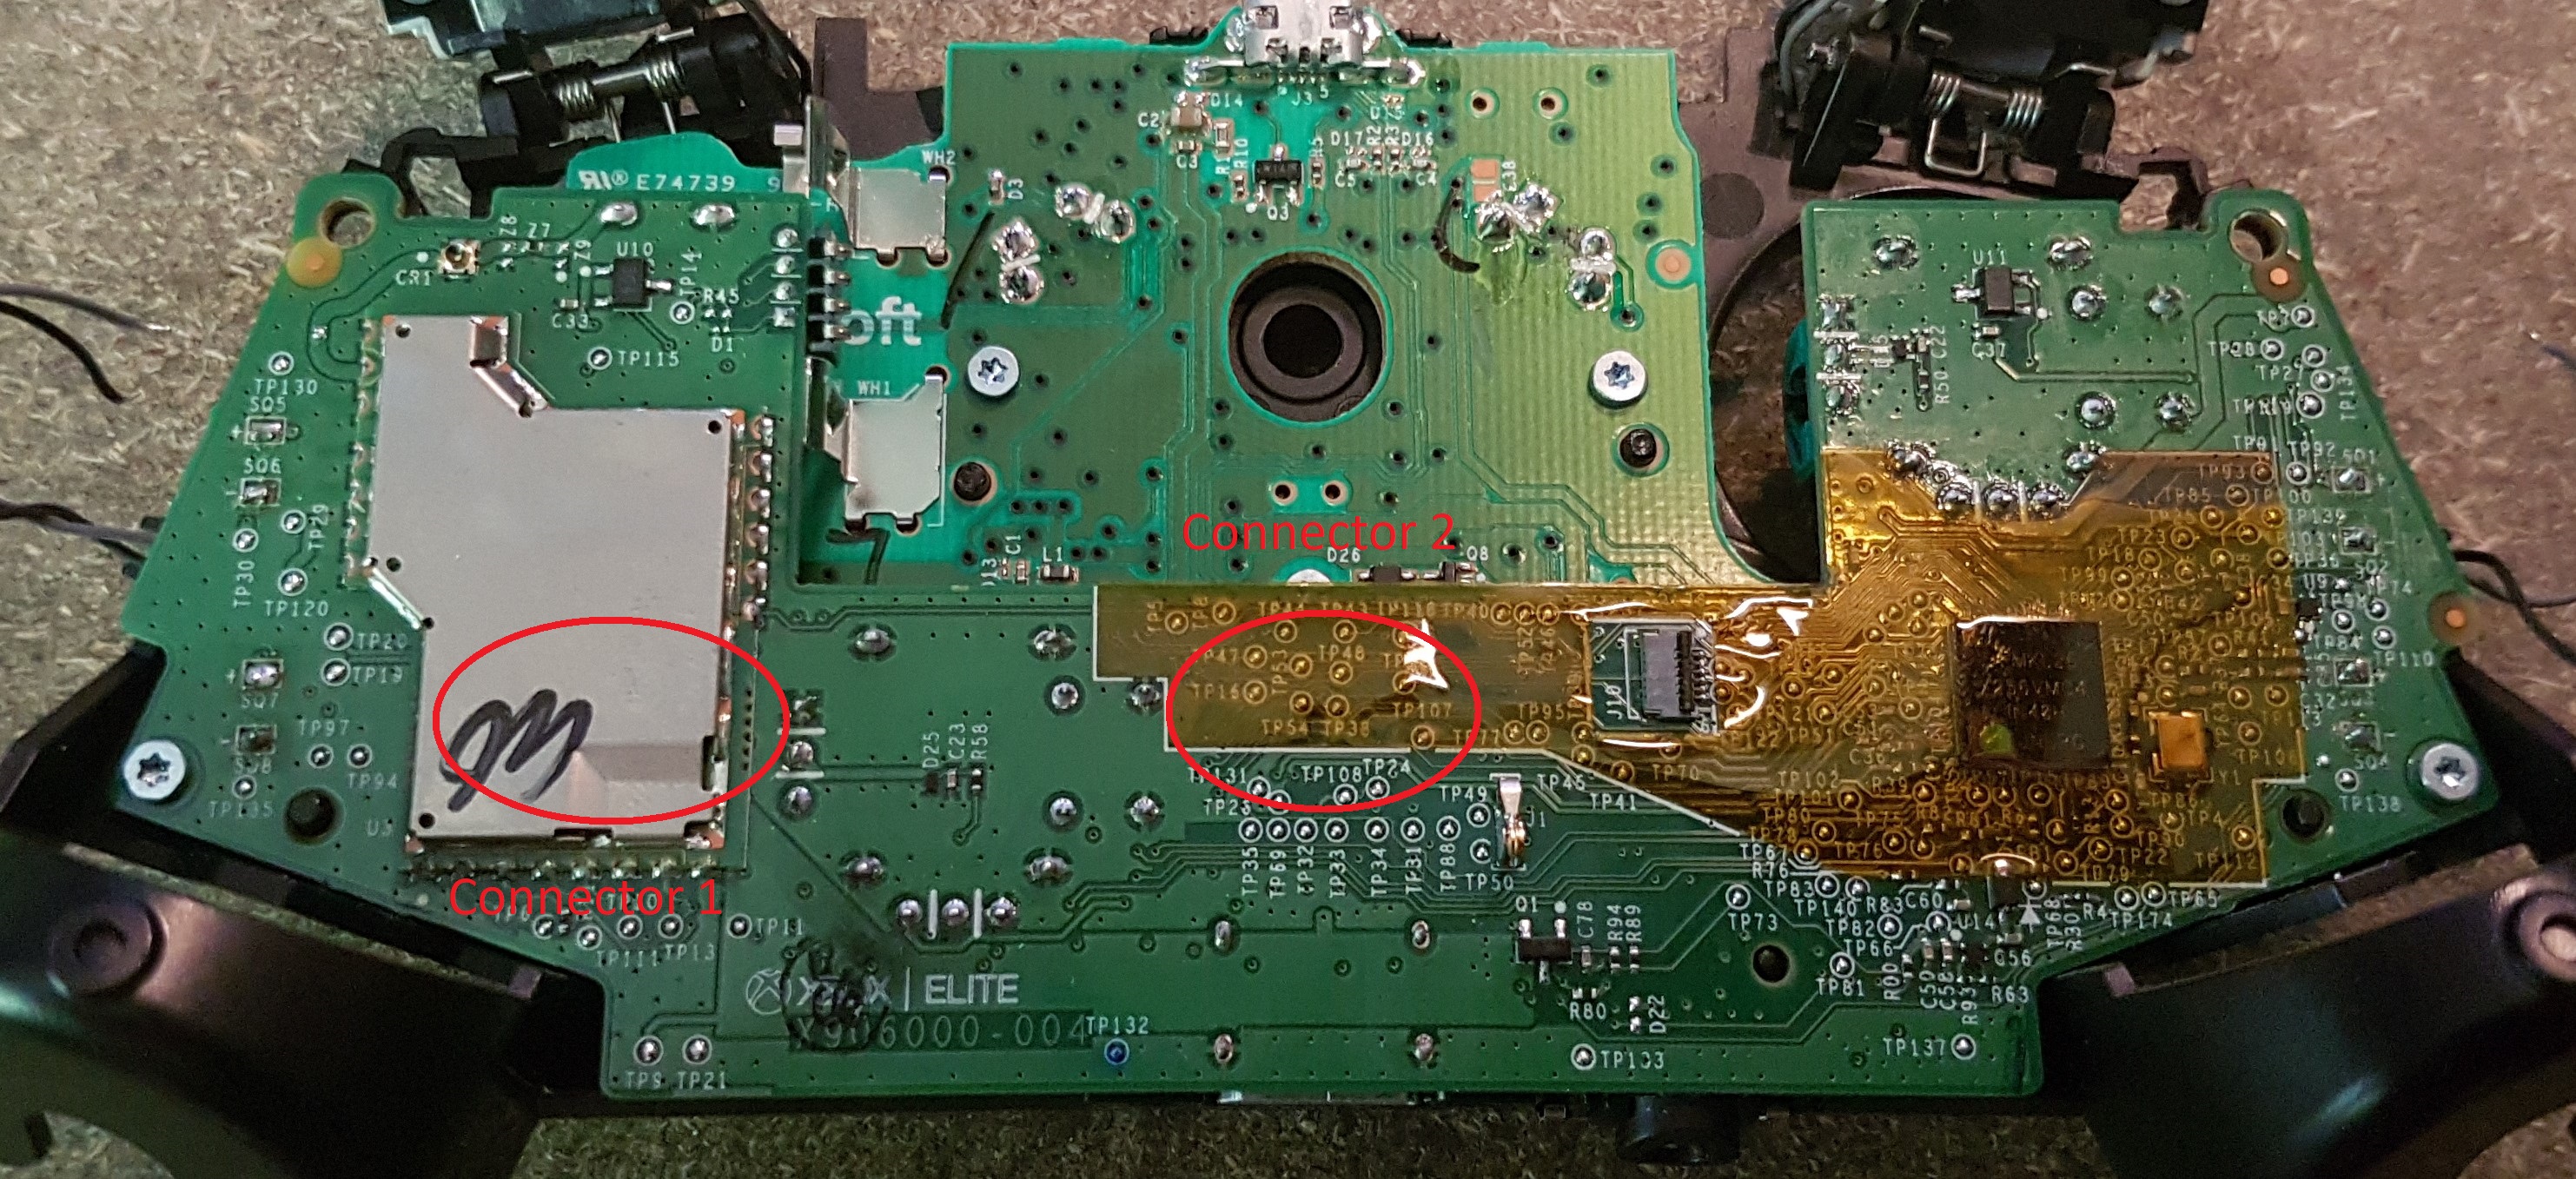
There are two PCBs in there, which are connected to each other through some headers. Now, to get the first out, we need to un-solder the vibration motor cables, and then remove the two screws holding it in place.
There are four motors to un-solder, which means that there are 4 pairs of two cables. They are easily identifiable:

Using your soldering iron, heat-up the solder area until you can pull the wire out of the PCB. Repeat this for each wire. If you feel like you don't know enough about soldering, there's a nice video on YouTube about it : https://www.youtube.com/watch?v=Qps9woUGkvI
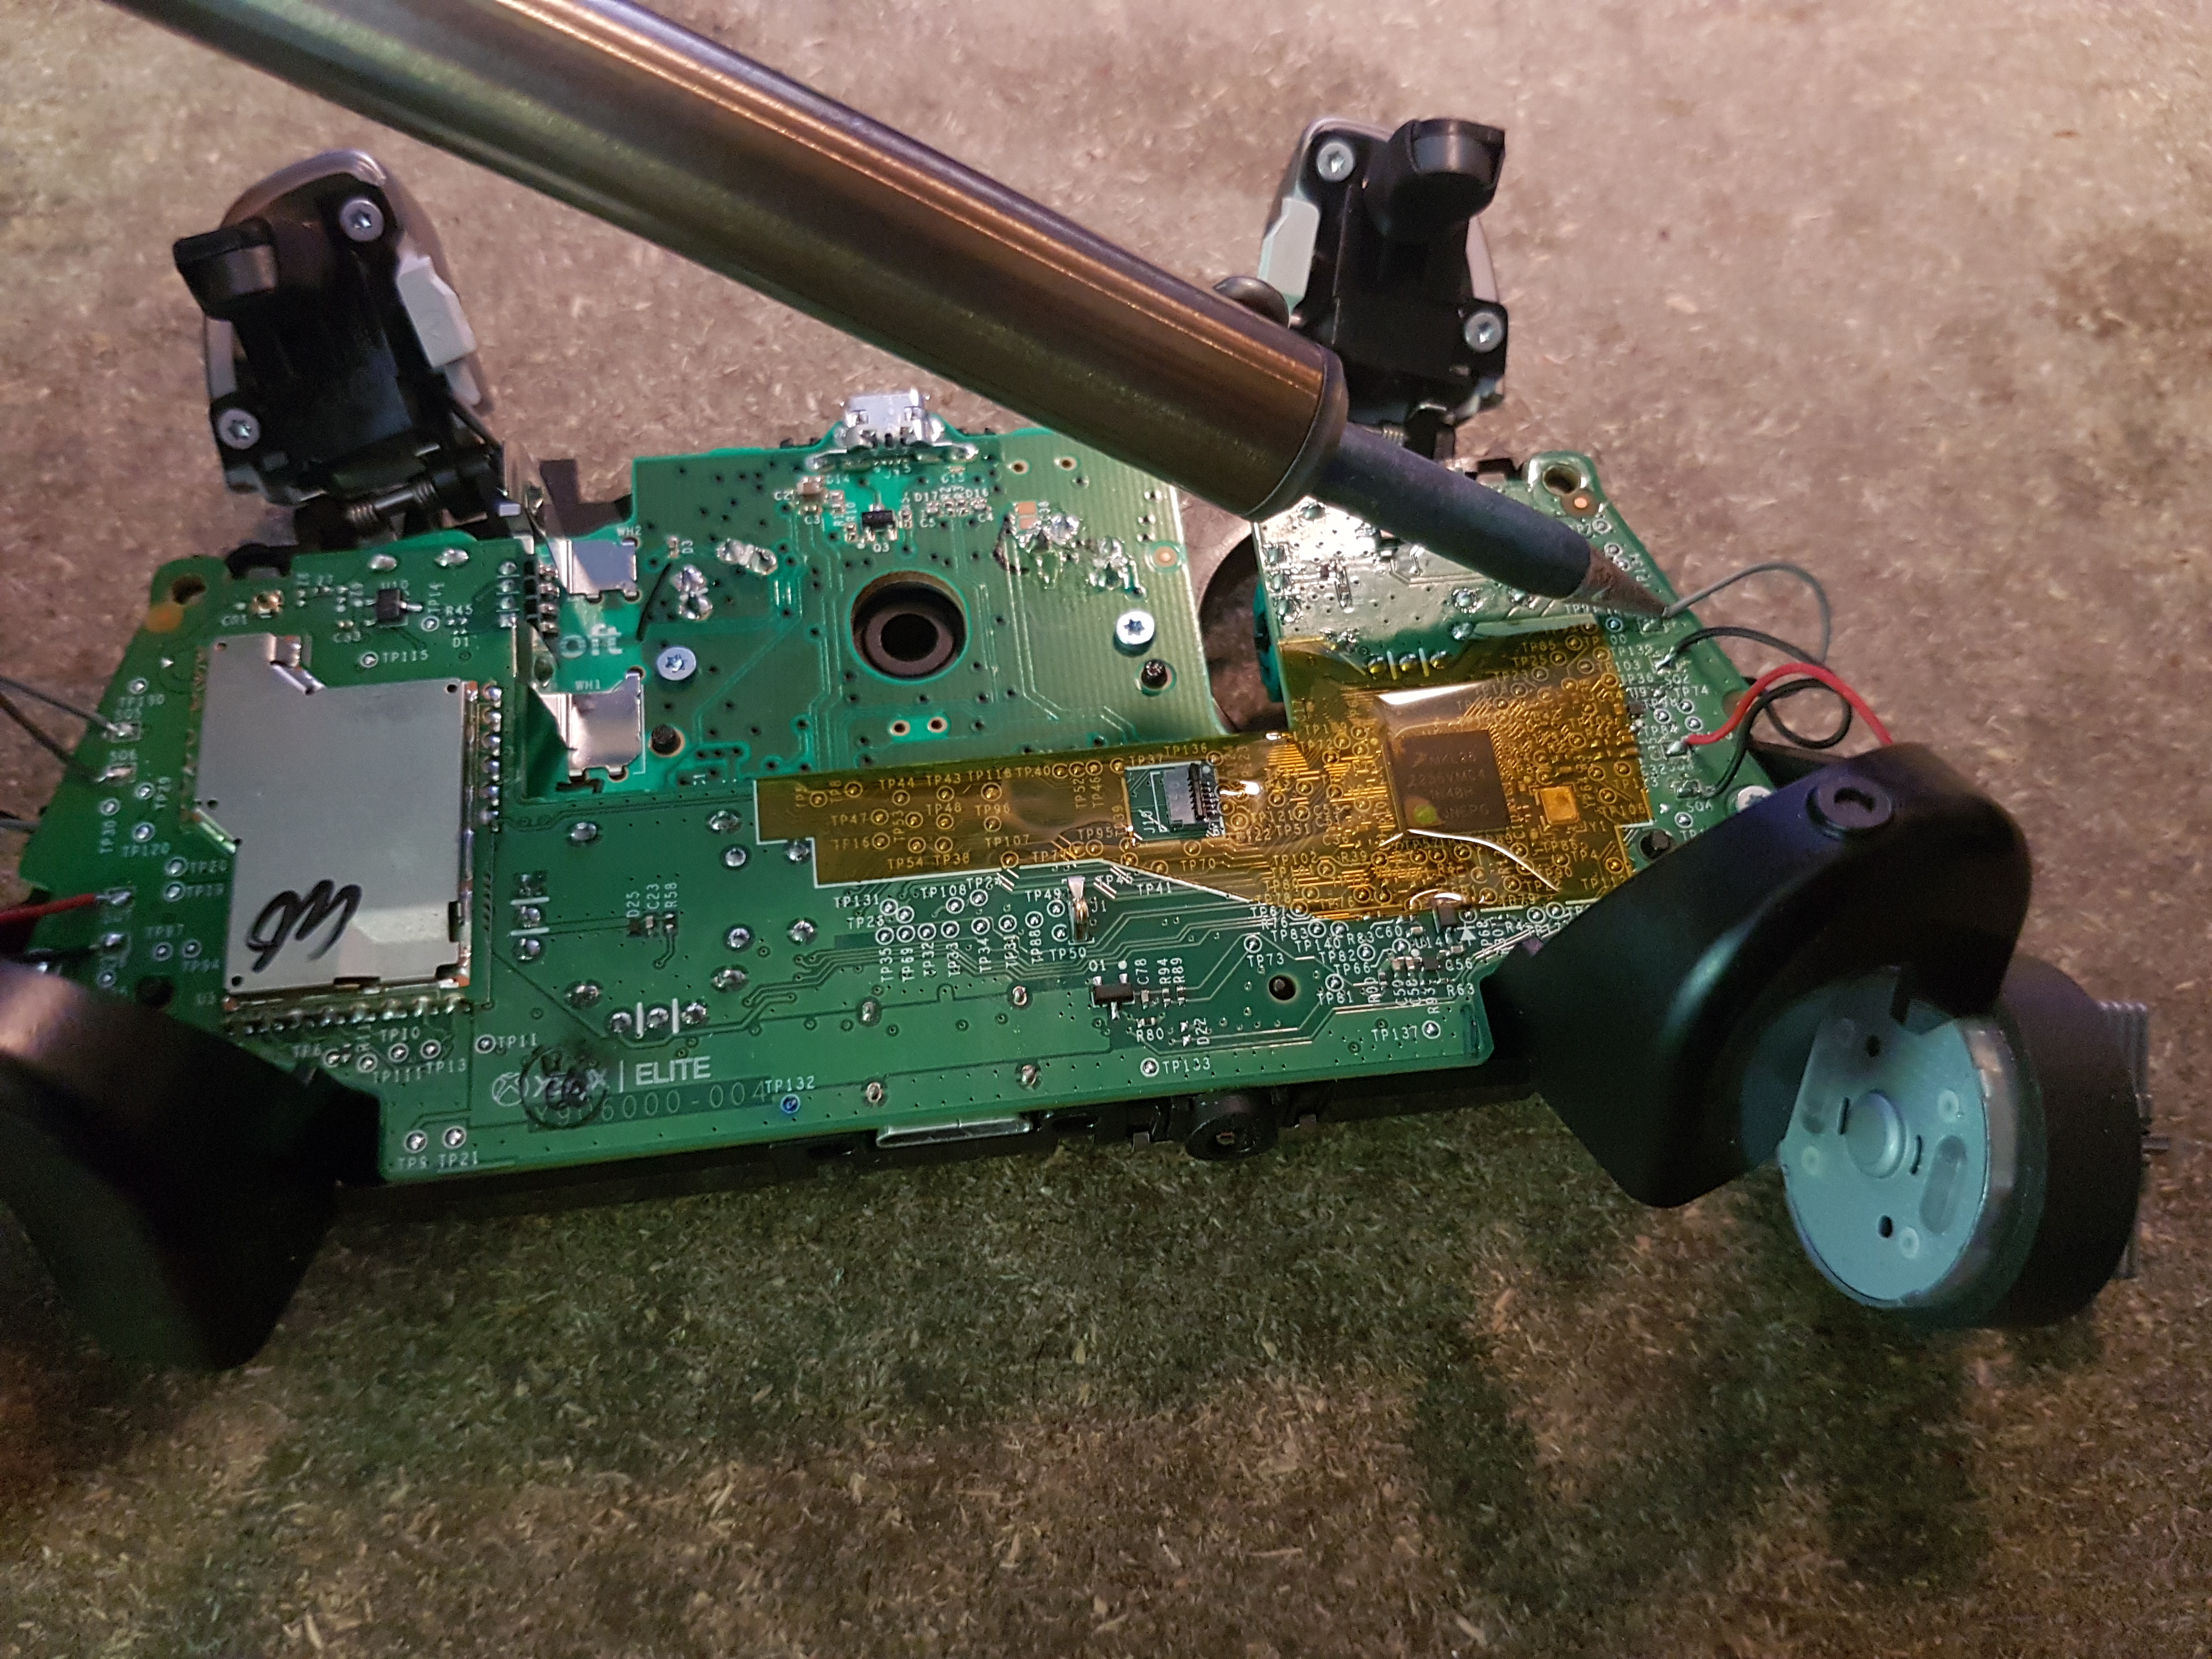
Congratulations 🎉 You've done the hardest part ! Now that you've removed the cables, let's remove the two screws holding the board in place using the TR6 screwdriver:

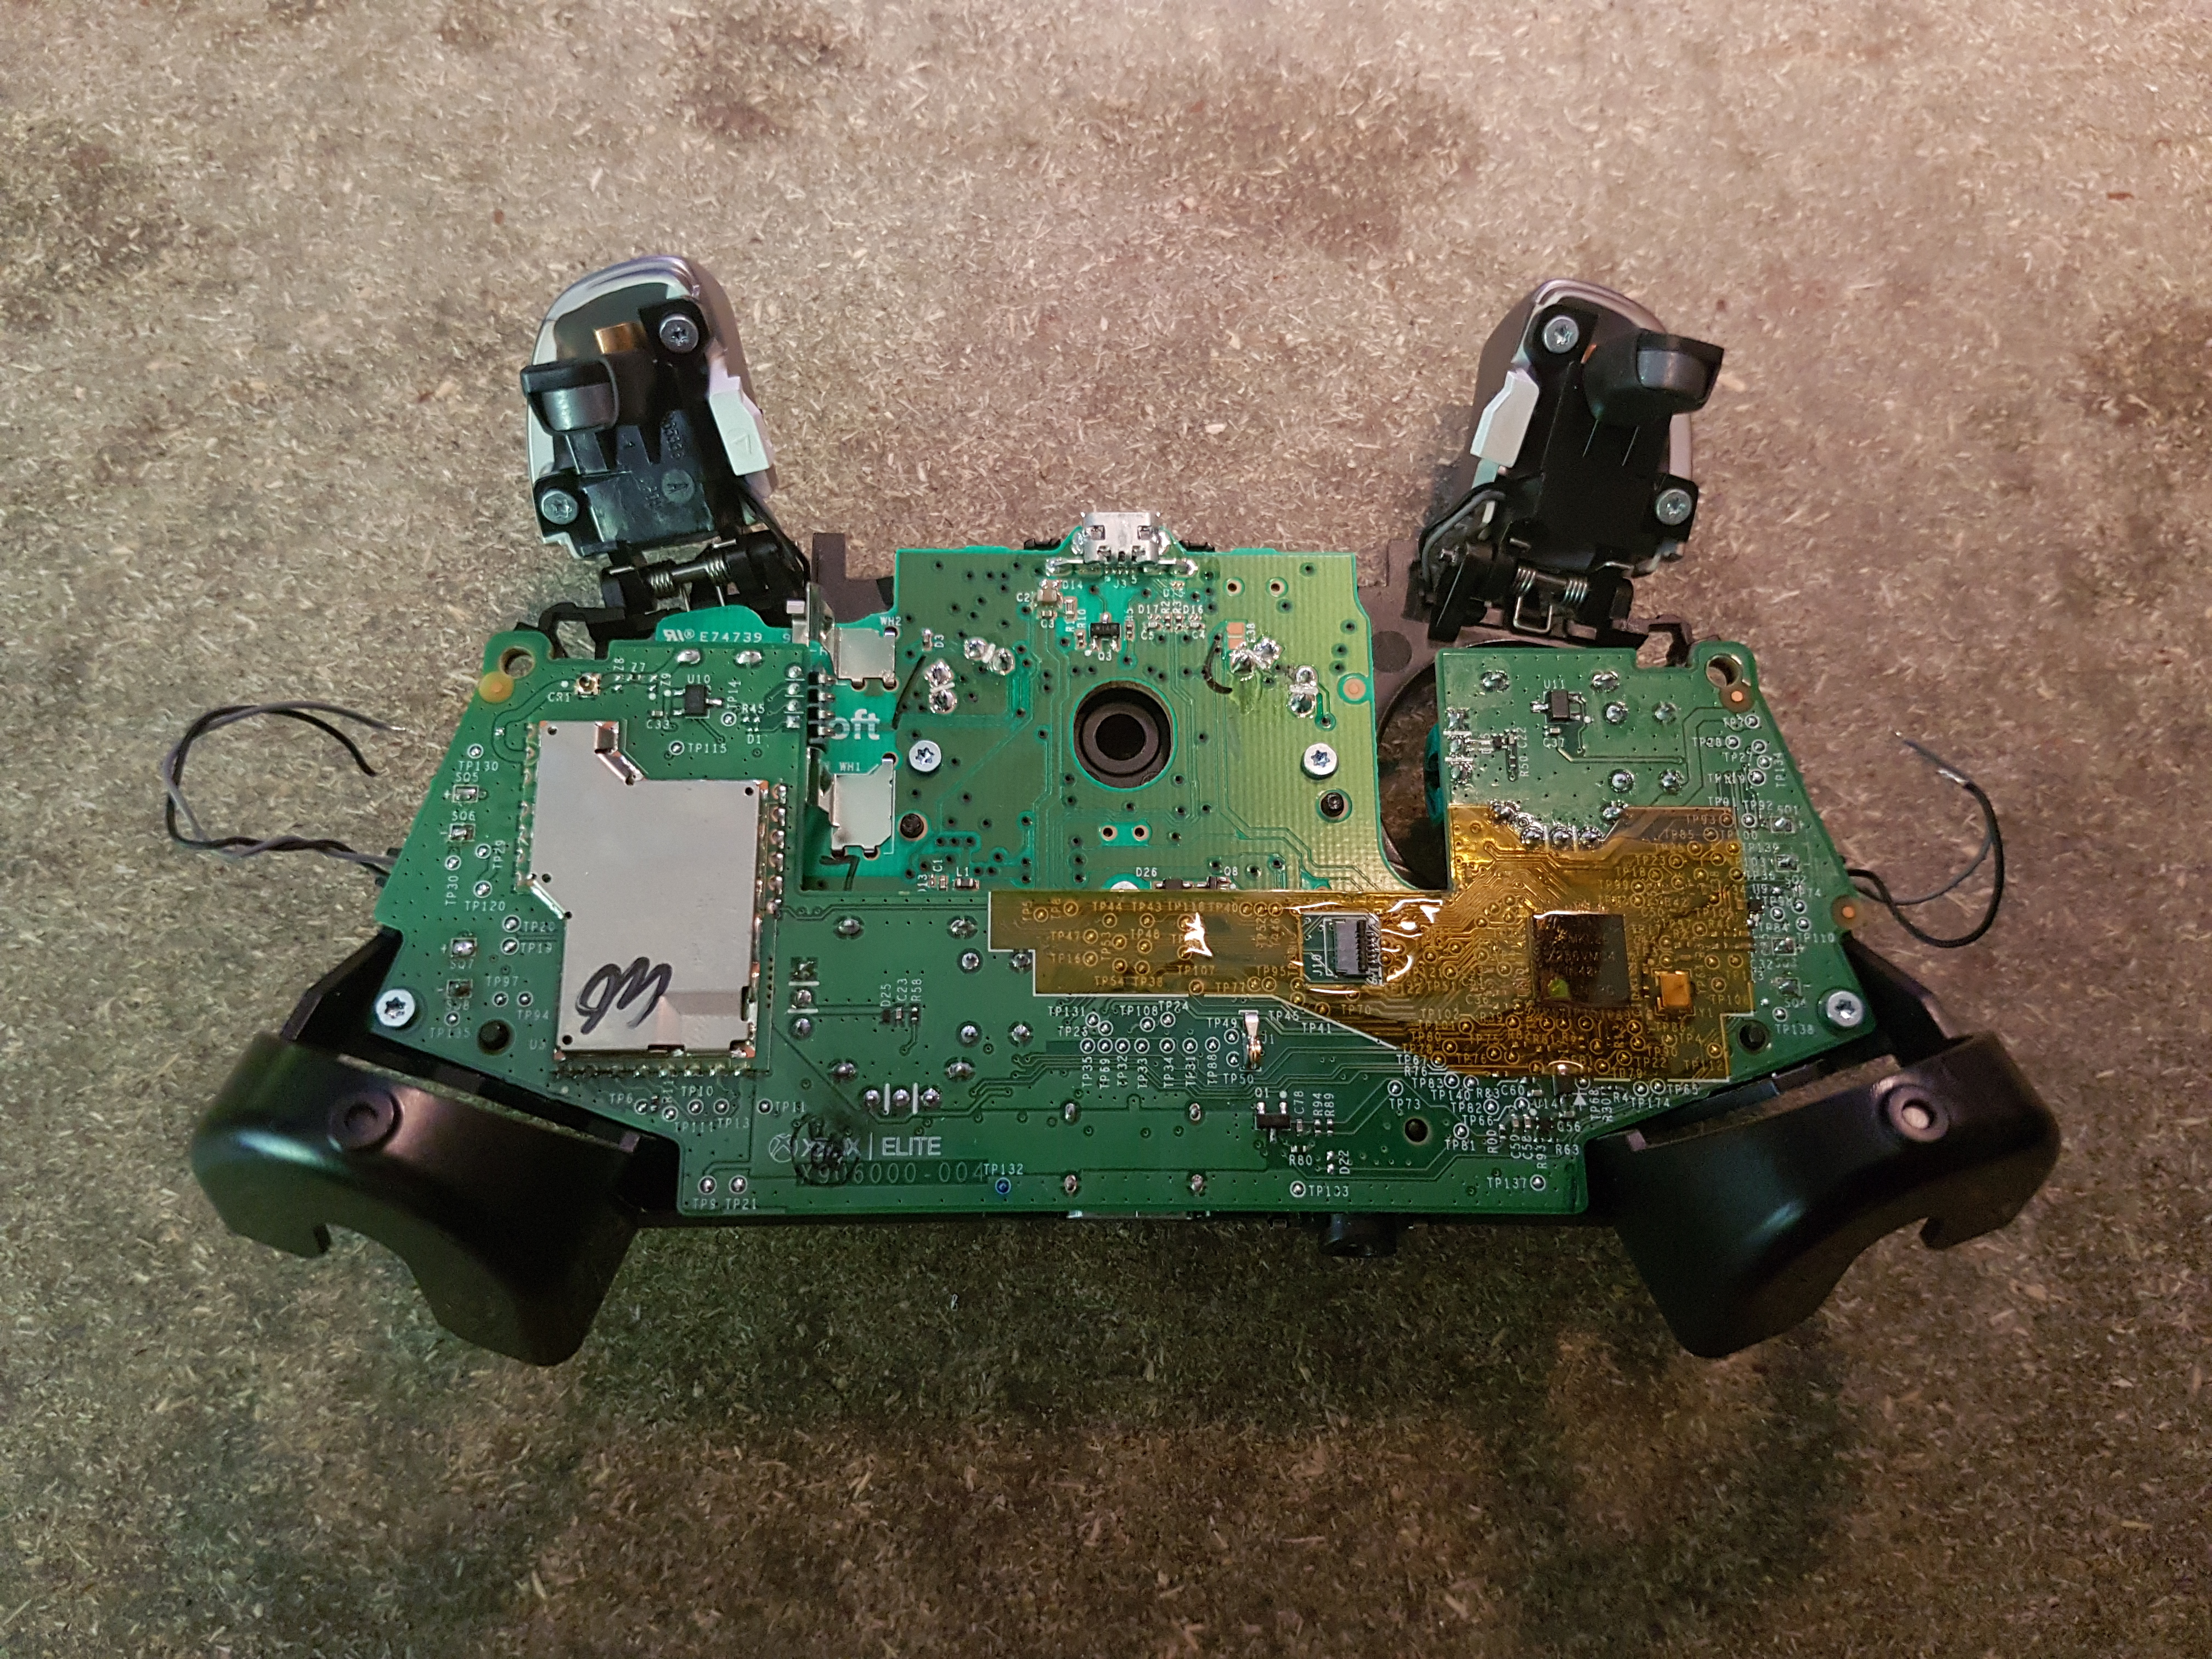
After removing the screws, you'll see that the board stays in place. It does because of the connectors between the first and second board. To remove it, you must pull gently the first board around the two hidden connectors:
With that first board removed, you should end up with something like this:
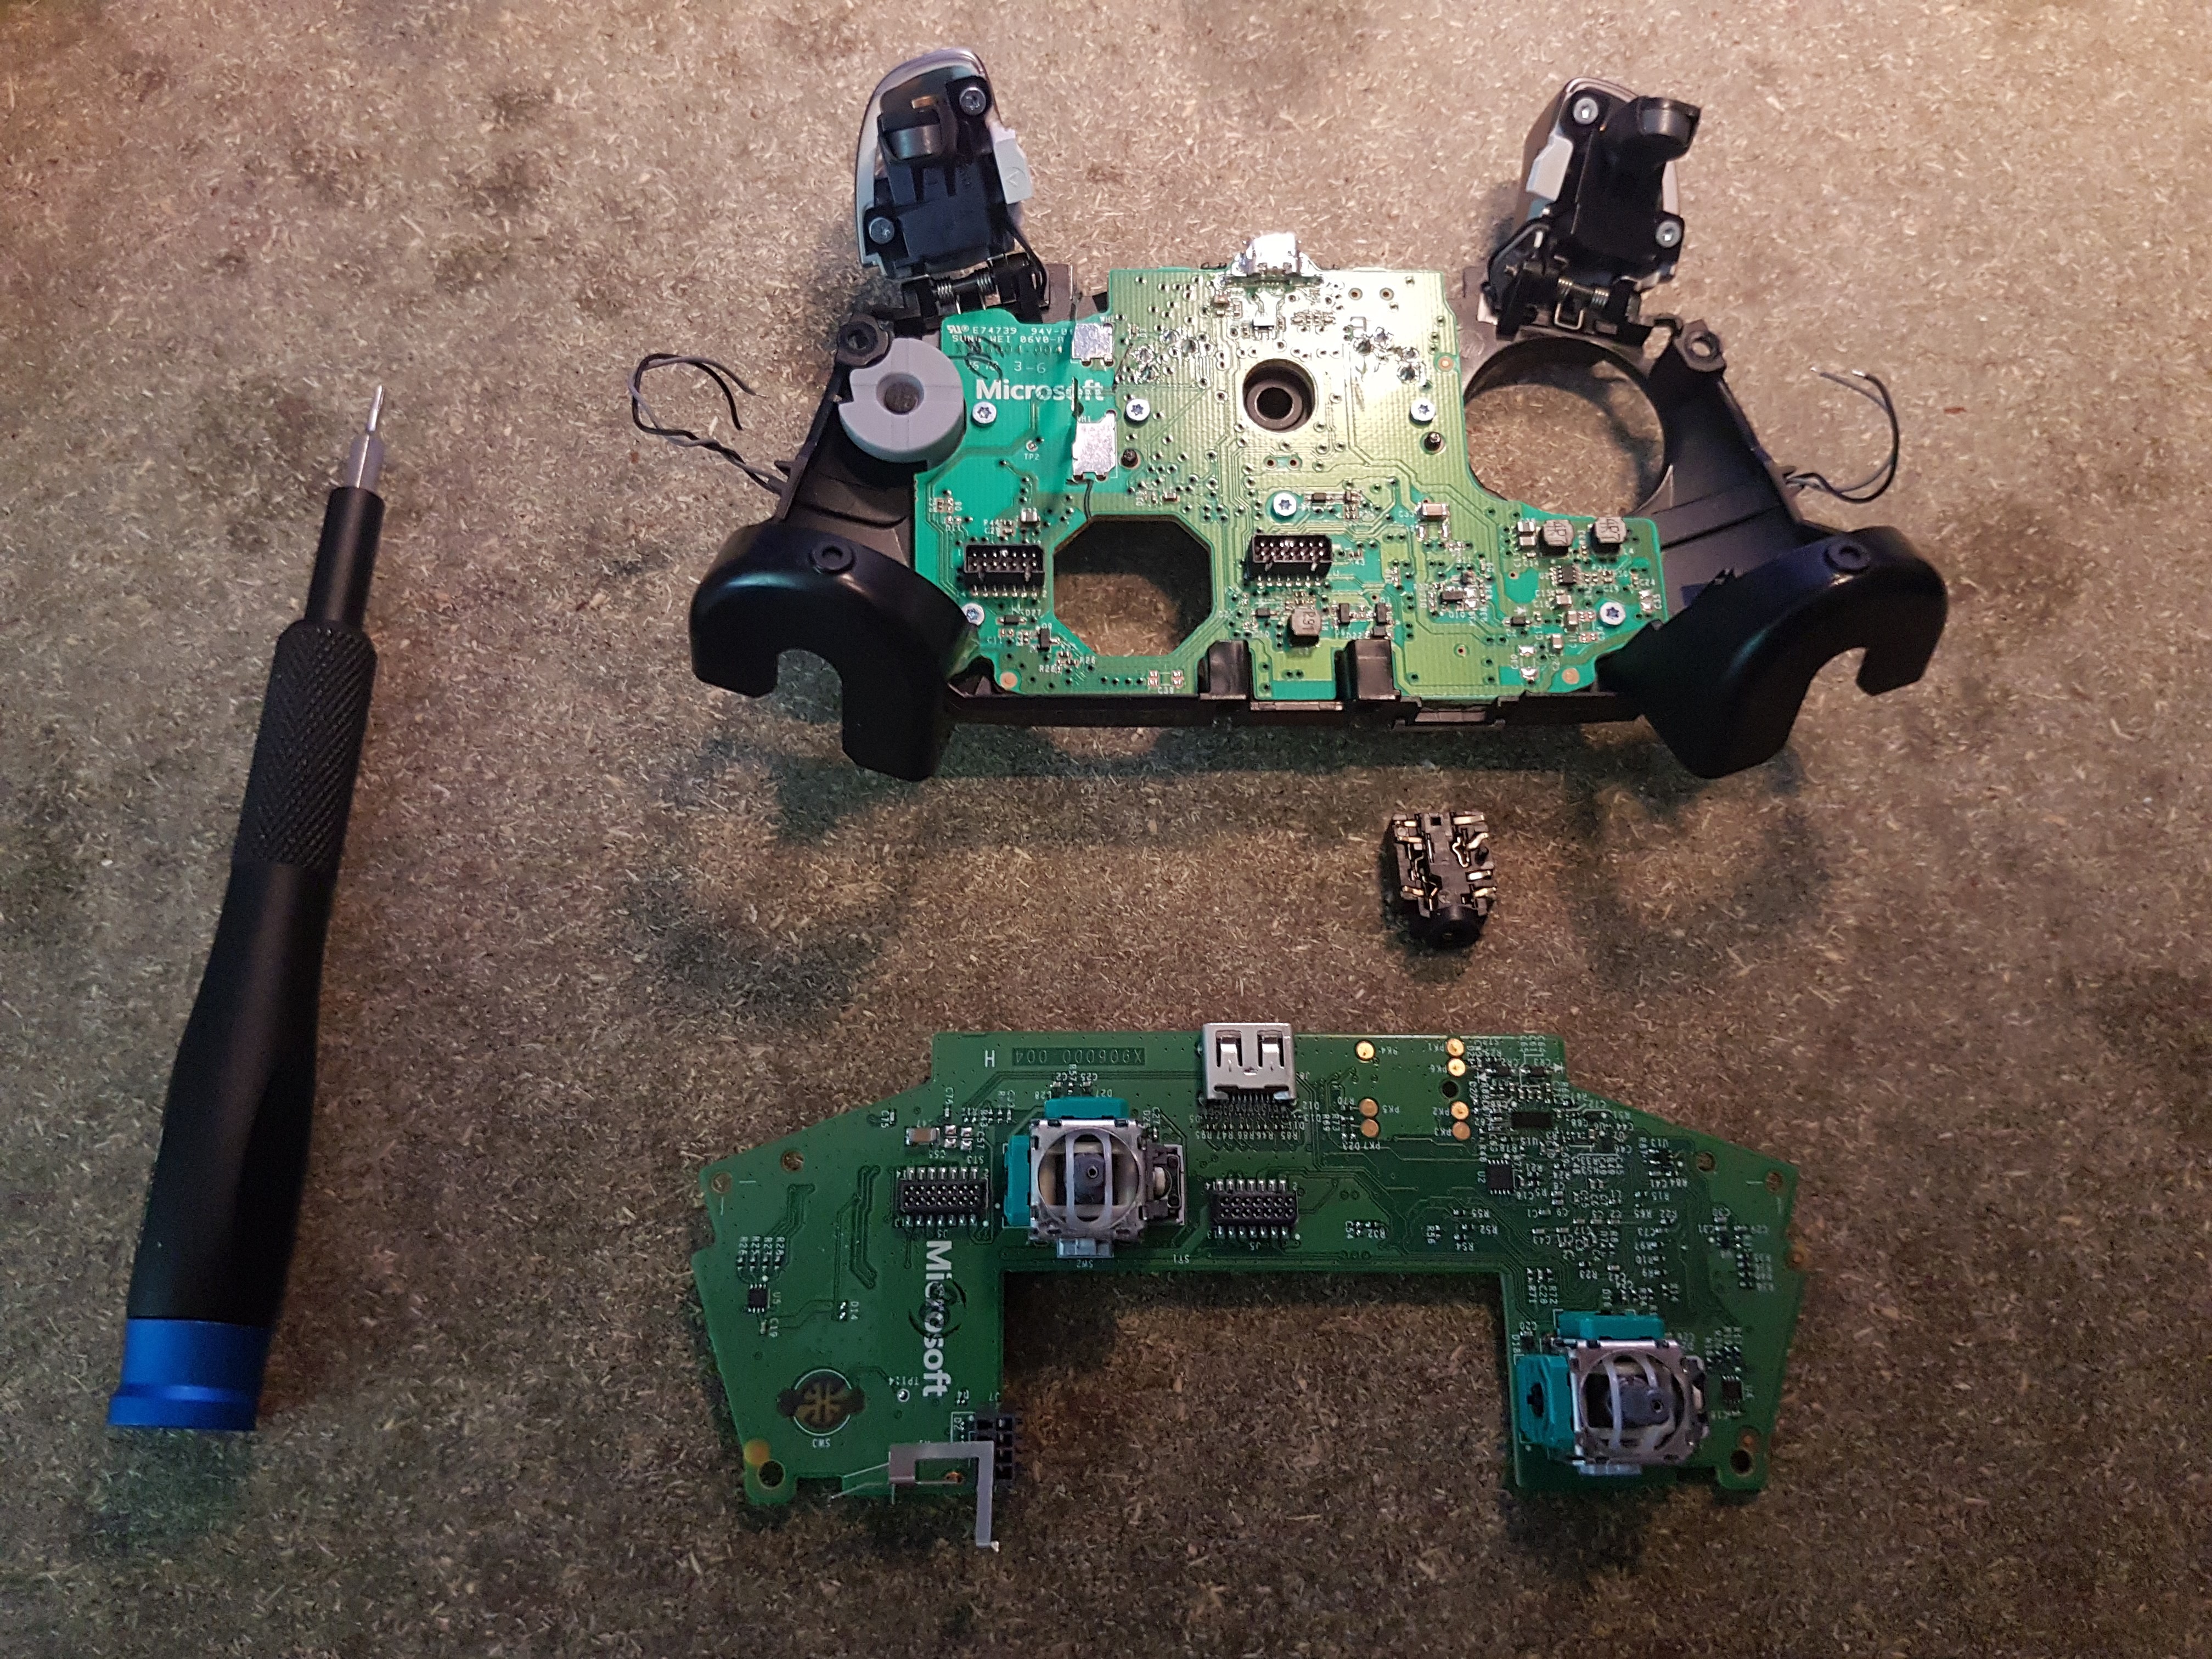
Note that the jack isn't soldered. It's normal that it moves. It just sits between the two boards, and makes contacts with the first board. Don't forget to place it back when you reassemble the controller !
Removing the second board
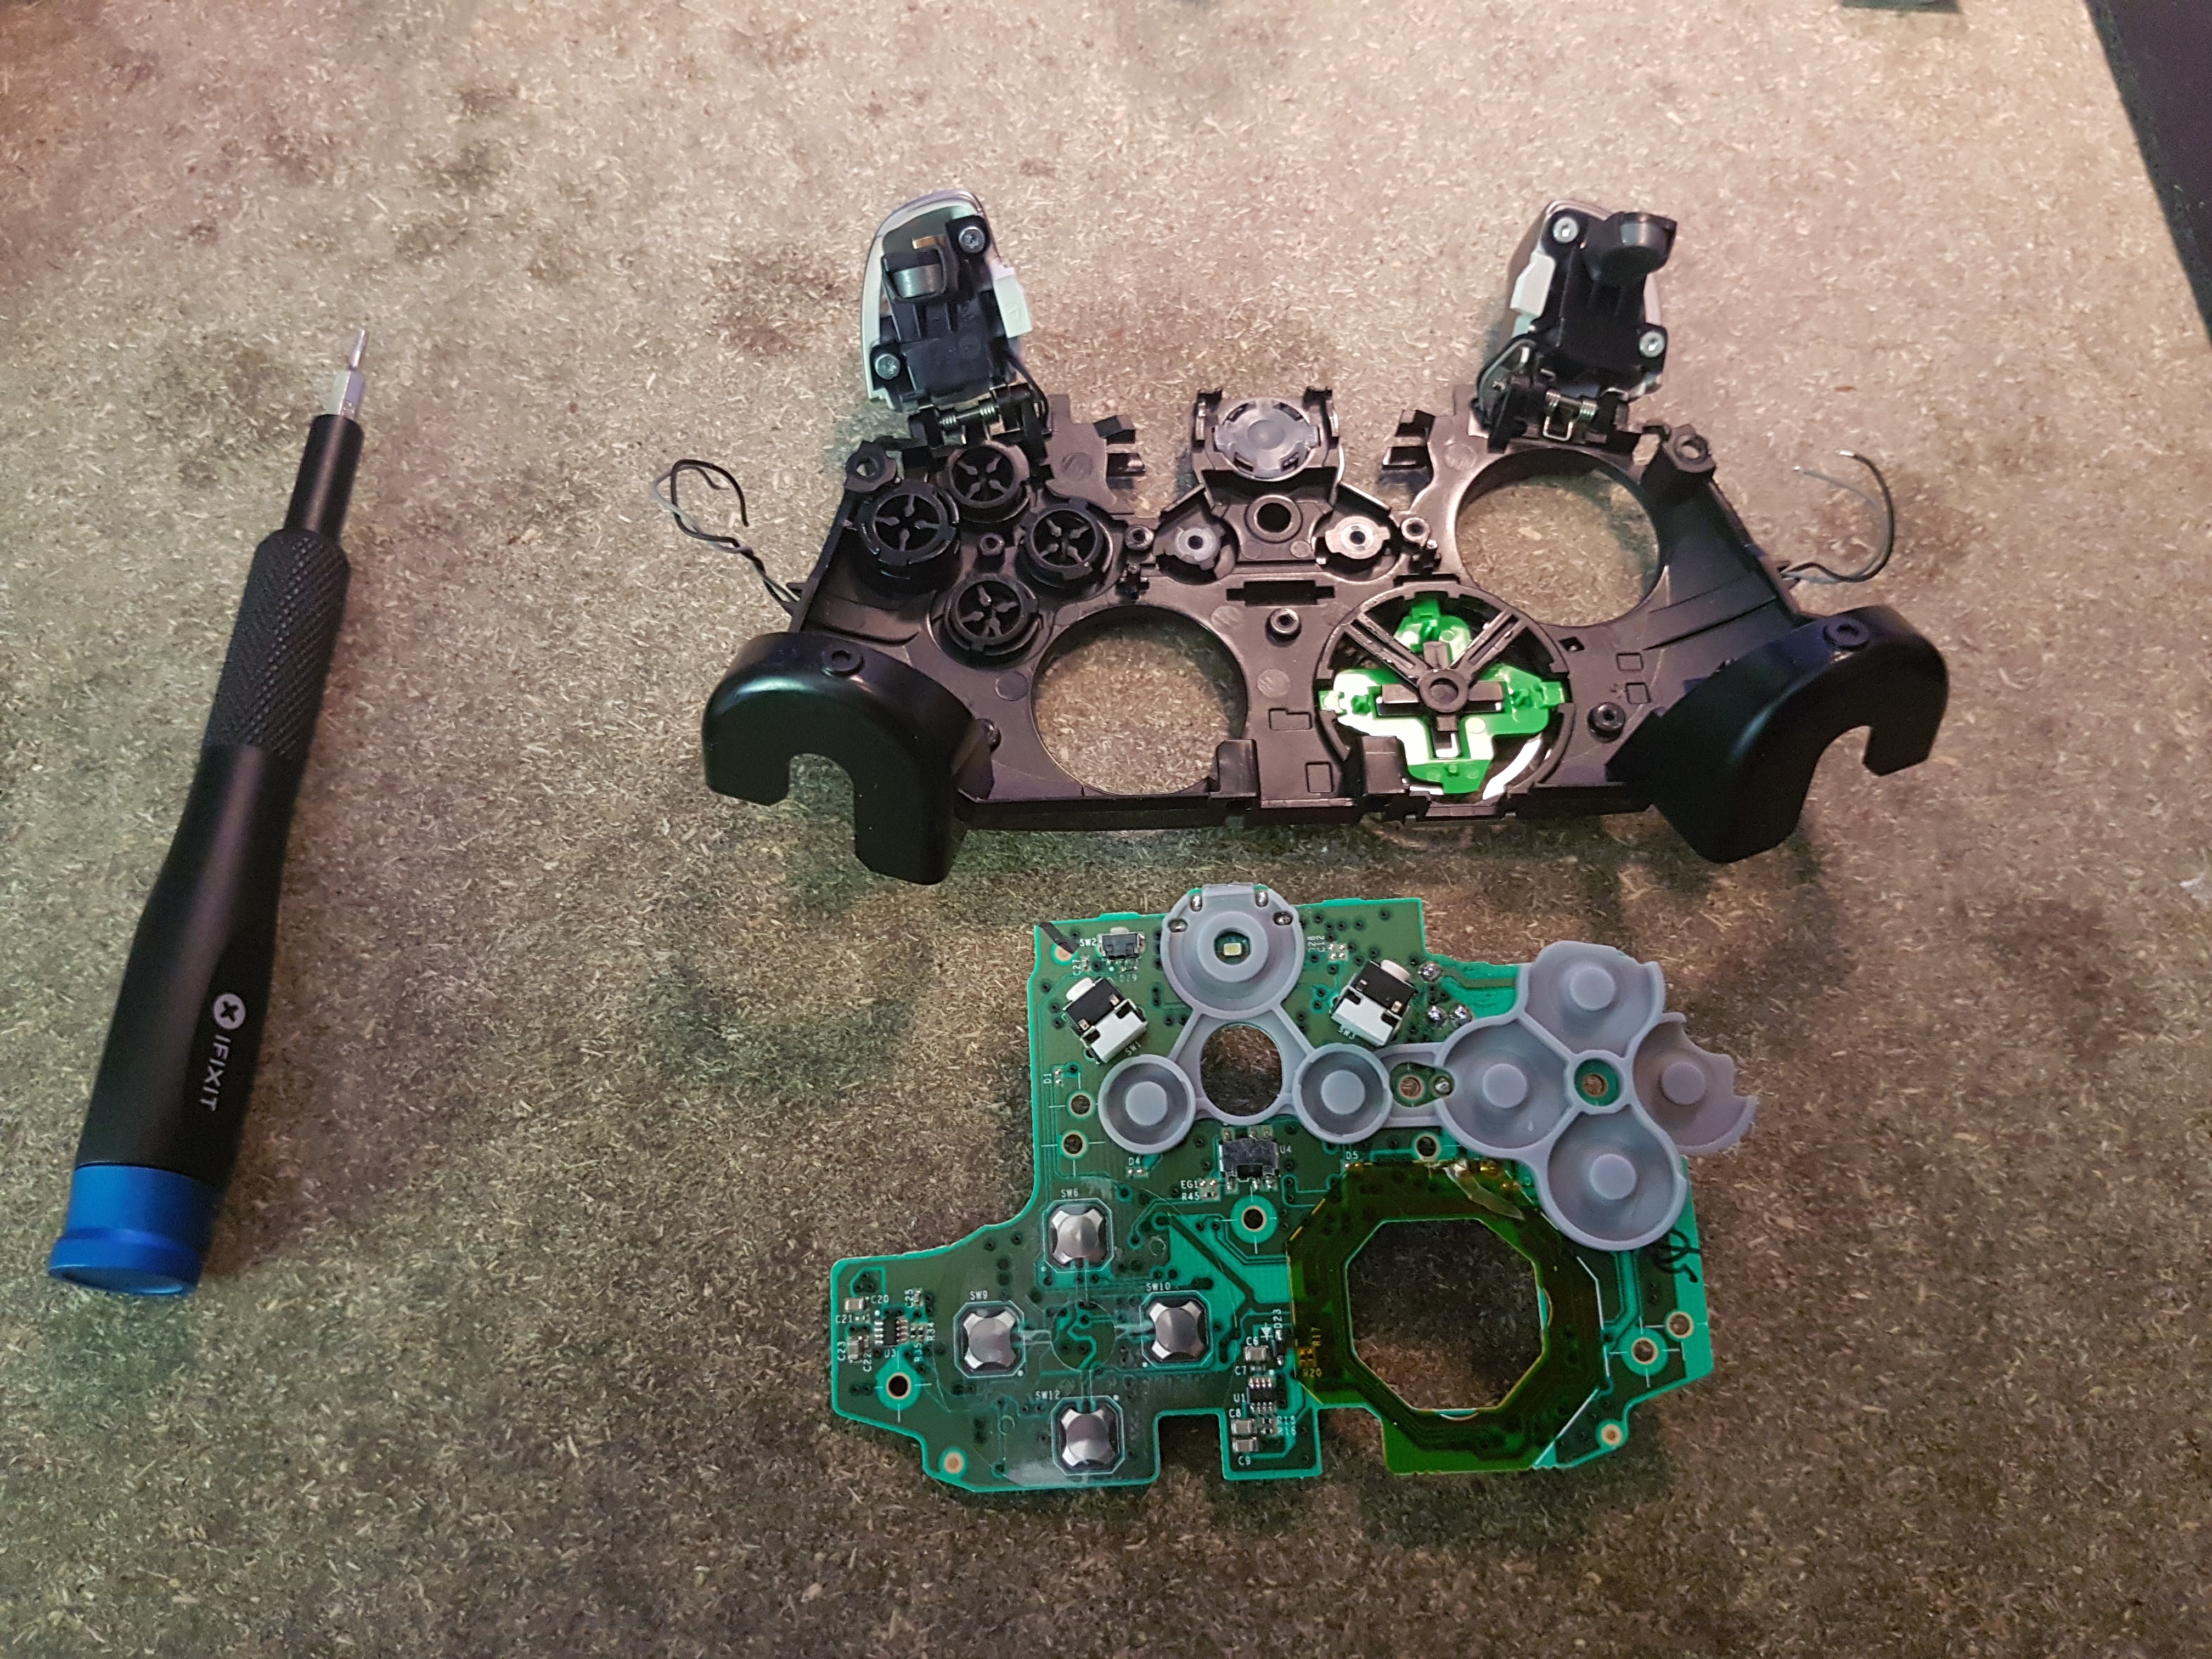
This is the easiest part. There are six screws to remove and you're done. Use the TR6 screw driver.

After removing the last PCB, you'll get access to the plastic conductive layer, and to the buttons.
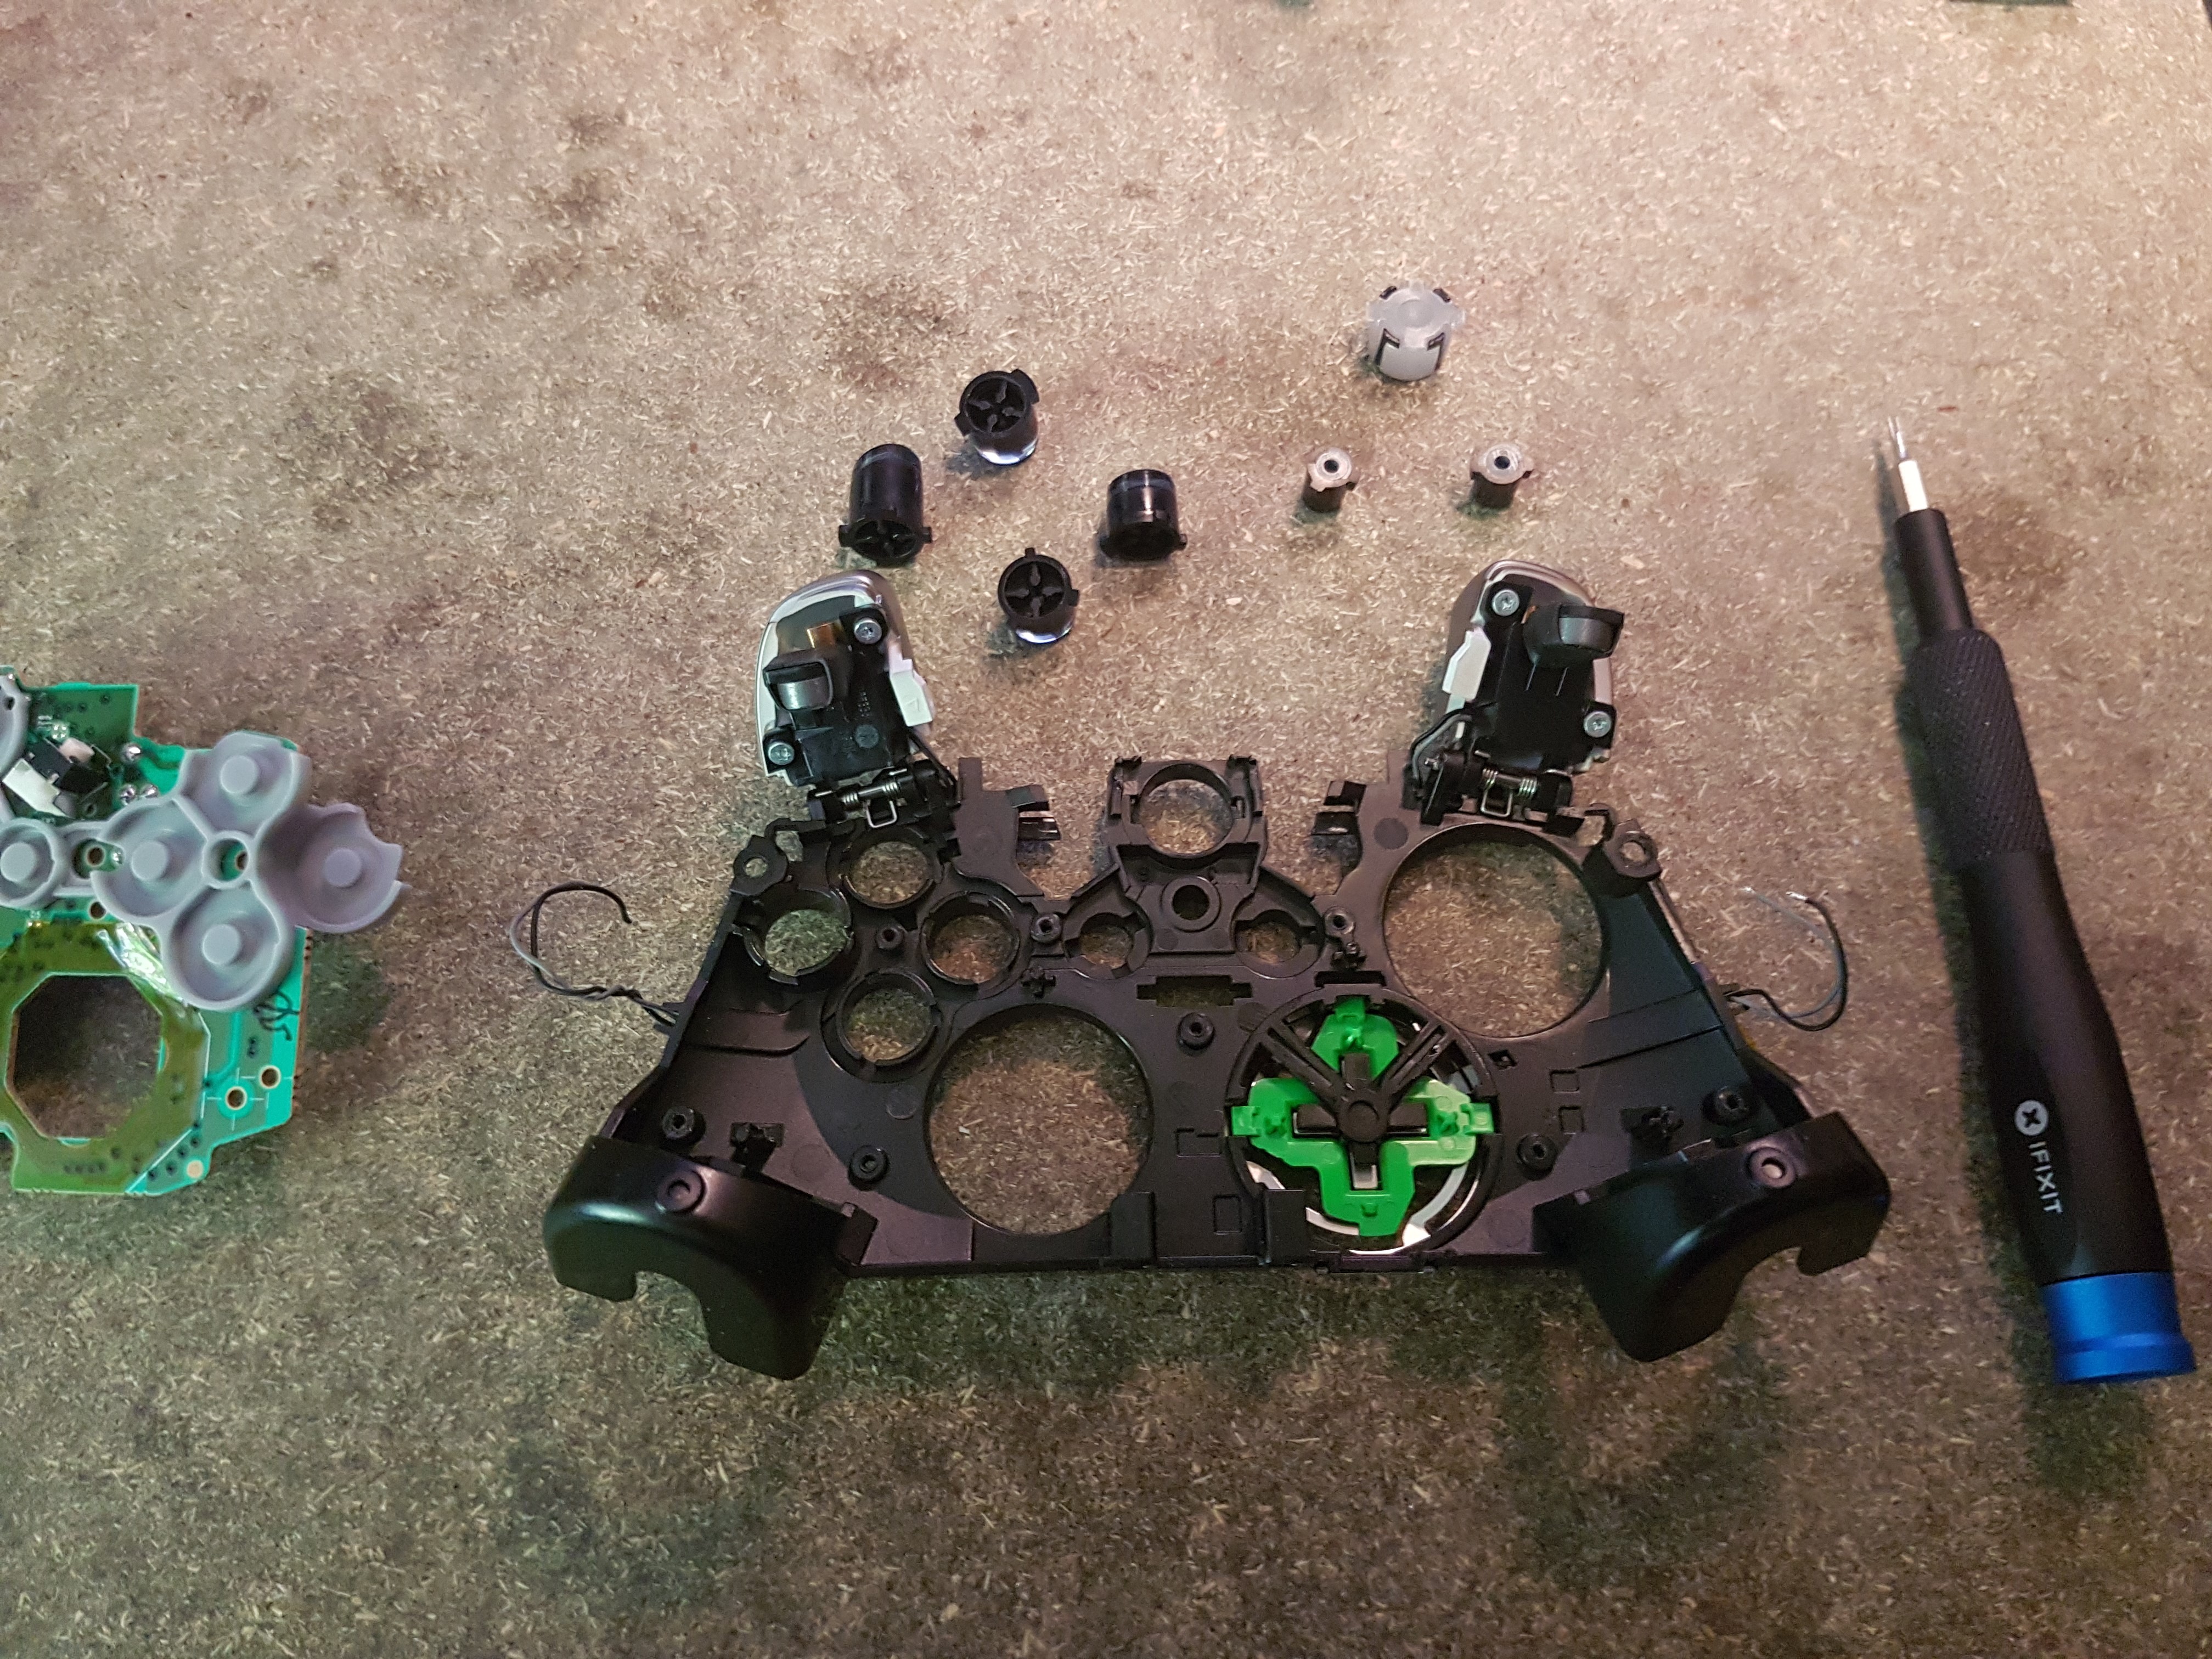
Cleaning the controller
After all this hard work, the only remaining task before reassembling the controller is to clean the button chambers, and the buttons themselves. To do that, use some cleaning alcohol and a Q-tip and make sure to clean everything correctly. Make sure it's dry before assembling.
Pro tip: When you're done cleaning, do not reassemble the whole controller. Just put back the buttons, the plastic conductive layer and the first PCB, screw it back and test if the buttons are still sticky. If not, clean again.
Reassembling the controller
Please read this post upside down. There's no special trick used to reassemble it. Just make sure all the tiny things are put back while assembling:
- The sync button
- The profile selection button
- The jack port
I tell you this because I happened to forget each one at least one time 😅.
TL;DR
I hope you've enjoyed this post, and if you have any questions or feedbacks, do not hesitate to tell me in the comments below.
Header Picture by wu yi on Unsplash
I took all the pictures used in this post, and if you want to use them please contact me first.